This guide explains how issuers create and review a batch in Namirial Notify. The screenshots illustrate the current New EviNotice Batch flow, but the overall wizard pattern is used as the reference example because the process is similar for other services that support batch sending.
The screenshots used for this guide show the current New EviNotice Batch wizard with these steps: Description, Content, Recipients, General, Advanced, and Schedule. In Description, click Create to start the batch. In the following steps, click Next to continue. In the last step, click Finish. Other supported batch flows can use different entry points or labels, but the step-by-step logic is similar.
Some batch options are service-specific. The screenshots in this guide show the EviNotice batch flow, so settings such as Agreement possibilities, acceptance or rejection reasons, and Allow notification refusal reflect that service. For example, EviSMS batch flows do not expose those recipient-interaction options.
- You are signed in as an issuer.
- Batch sending is enabled for your environment and account.
- You are creating a batch for
EviNotice,EviMail, orEviSMS. - You have the batch description, content, recipient data, and scheduling information ready.
- If you want to add recipients from saved contacts, your contact list is available in Contacts.
Batch sending is available for EviNotice, EviMail, and EviSMS. EviSign and EviPost are handled through their individual creation flows in this guide set.
The wizard pattern is similar across supported batch services, but some fields differ:
| Service | Main content fields | Recipient input | Service-specific options |
|---|---|---|---|
EviNotice | Subject, rich-text notice body, shared attachments | address and legal name, plus optional challenge or OTP fields | agreement possibilities, acceptance or rejection reasons, refusal settings, notification channel |
EviMail | Subject, rich-text email body, shared attachments | email address and legal name, plus optional evidence access challenge fields | agreement possibilities, acceptance or rejection reasons, email sender settings |
EviSMS | message text | phone number and legal name, plus optional evidence access challenge fields | mobile-message settings; no notice-style acceptance or rejection workflow |
- Sign in to Namirial Notify.
- In
NEW SUBMISSION, open the area for the service you want to use in the batch. - Select the option to create a new batch.
- In the screenshots used for this guide, this opens
New EviNotice Batch.
After the wizard opens, complete each step in sequence.
- Open
Description. - Enter a value in
Description. - Click Create.
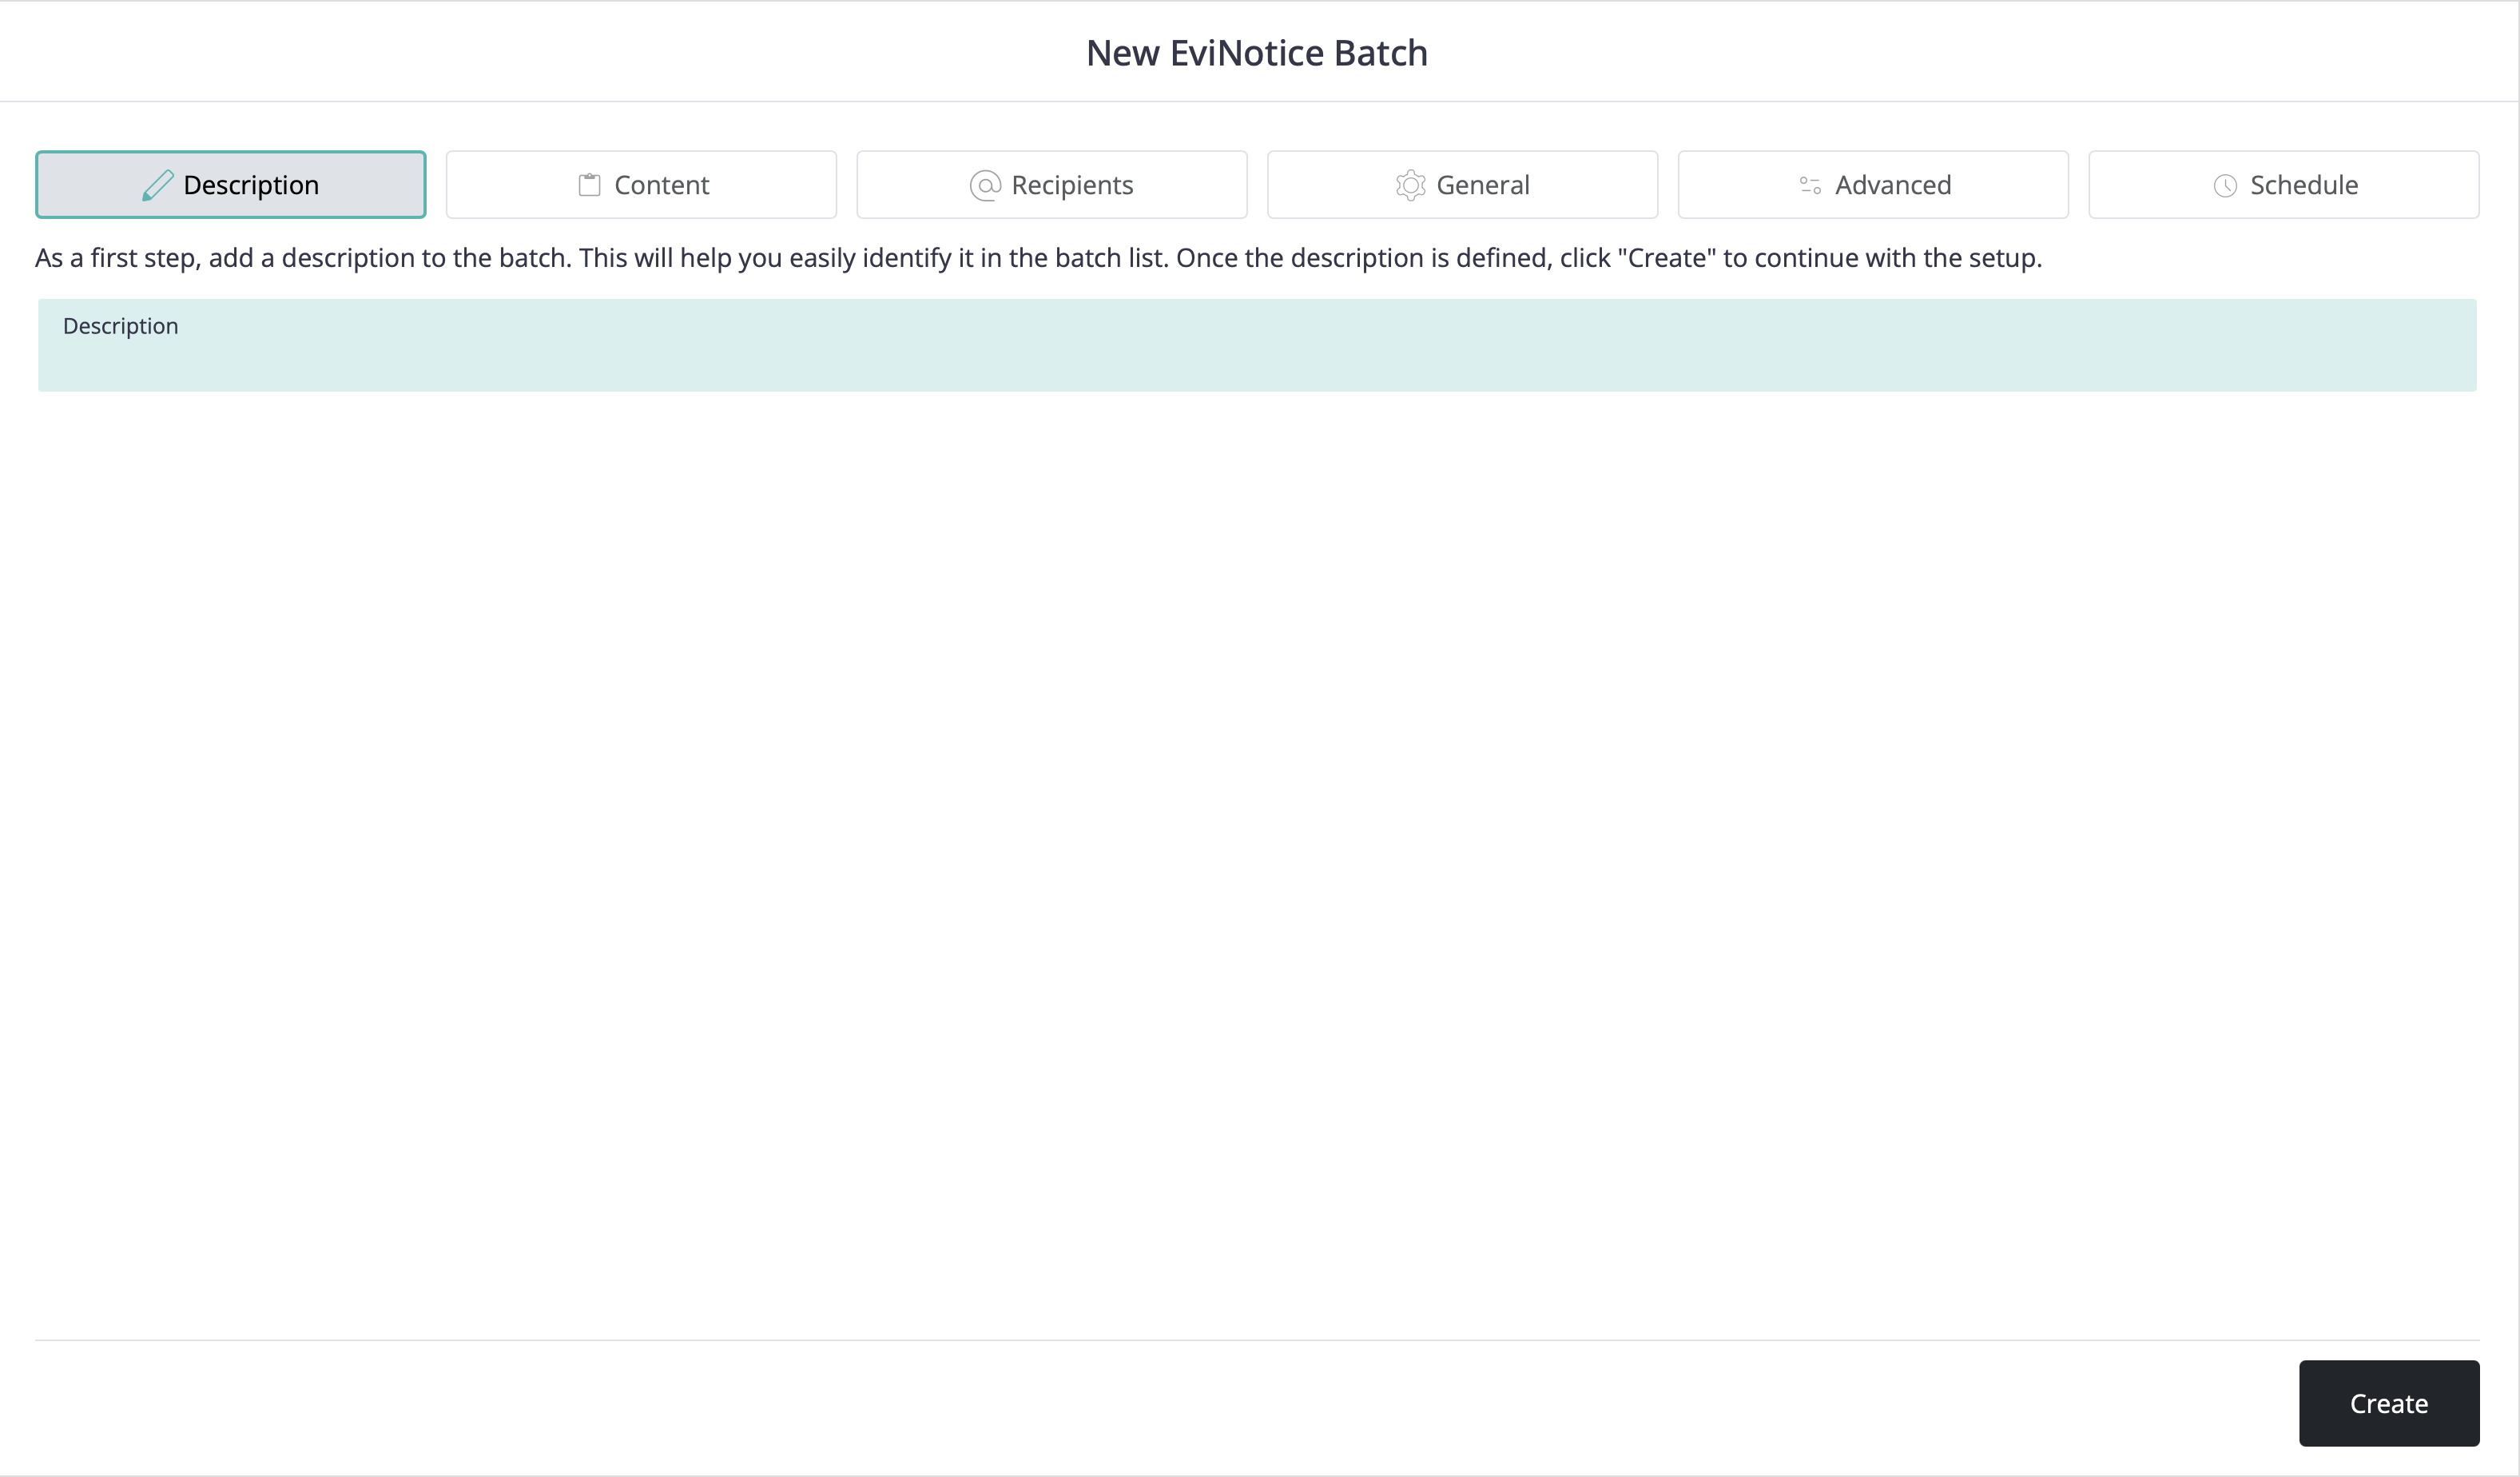
Use a description that makes the batch easy to identify later in the batch list.
- Open
Content. - Enter the
Subject. - Enter the message body in the rich-text editor.
- Use dynamic variables if you want to personalize the content for each recipient.
- Add shared files in
Attachmentsif needed. - Click Next.
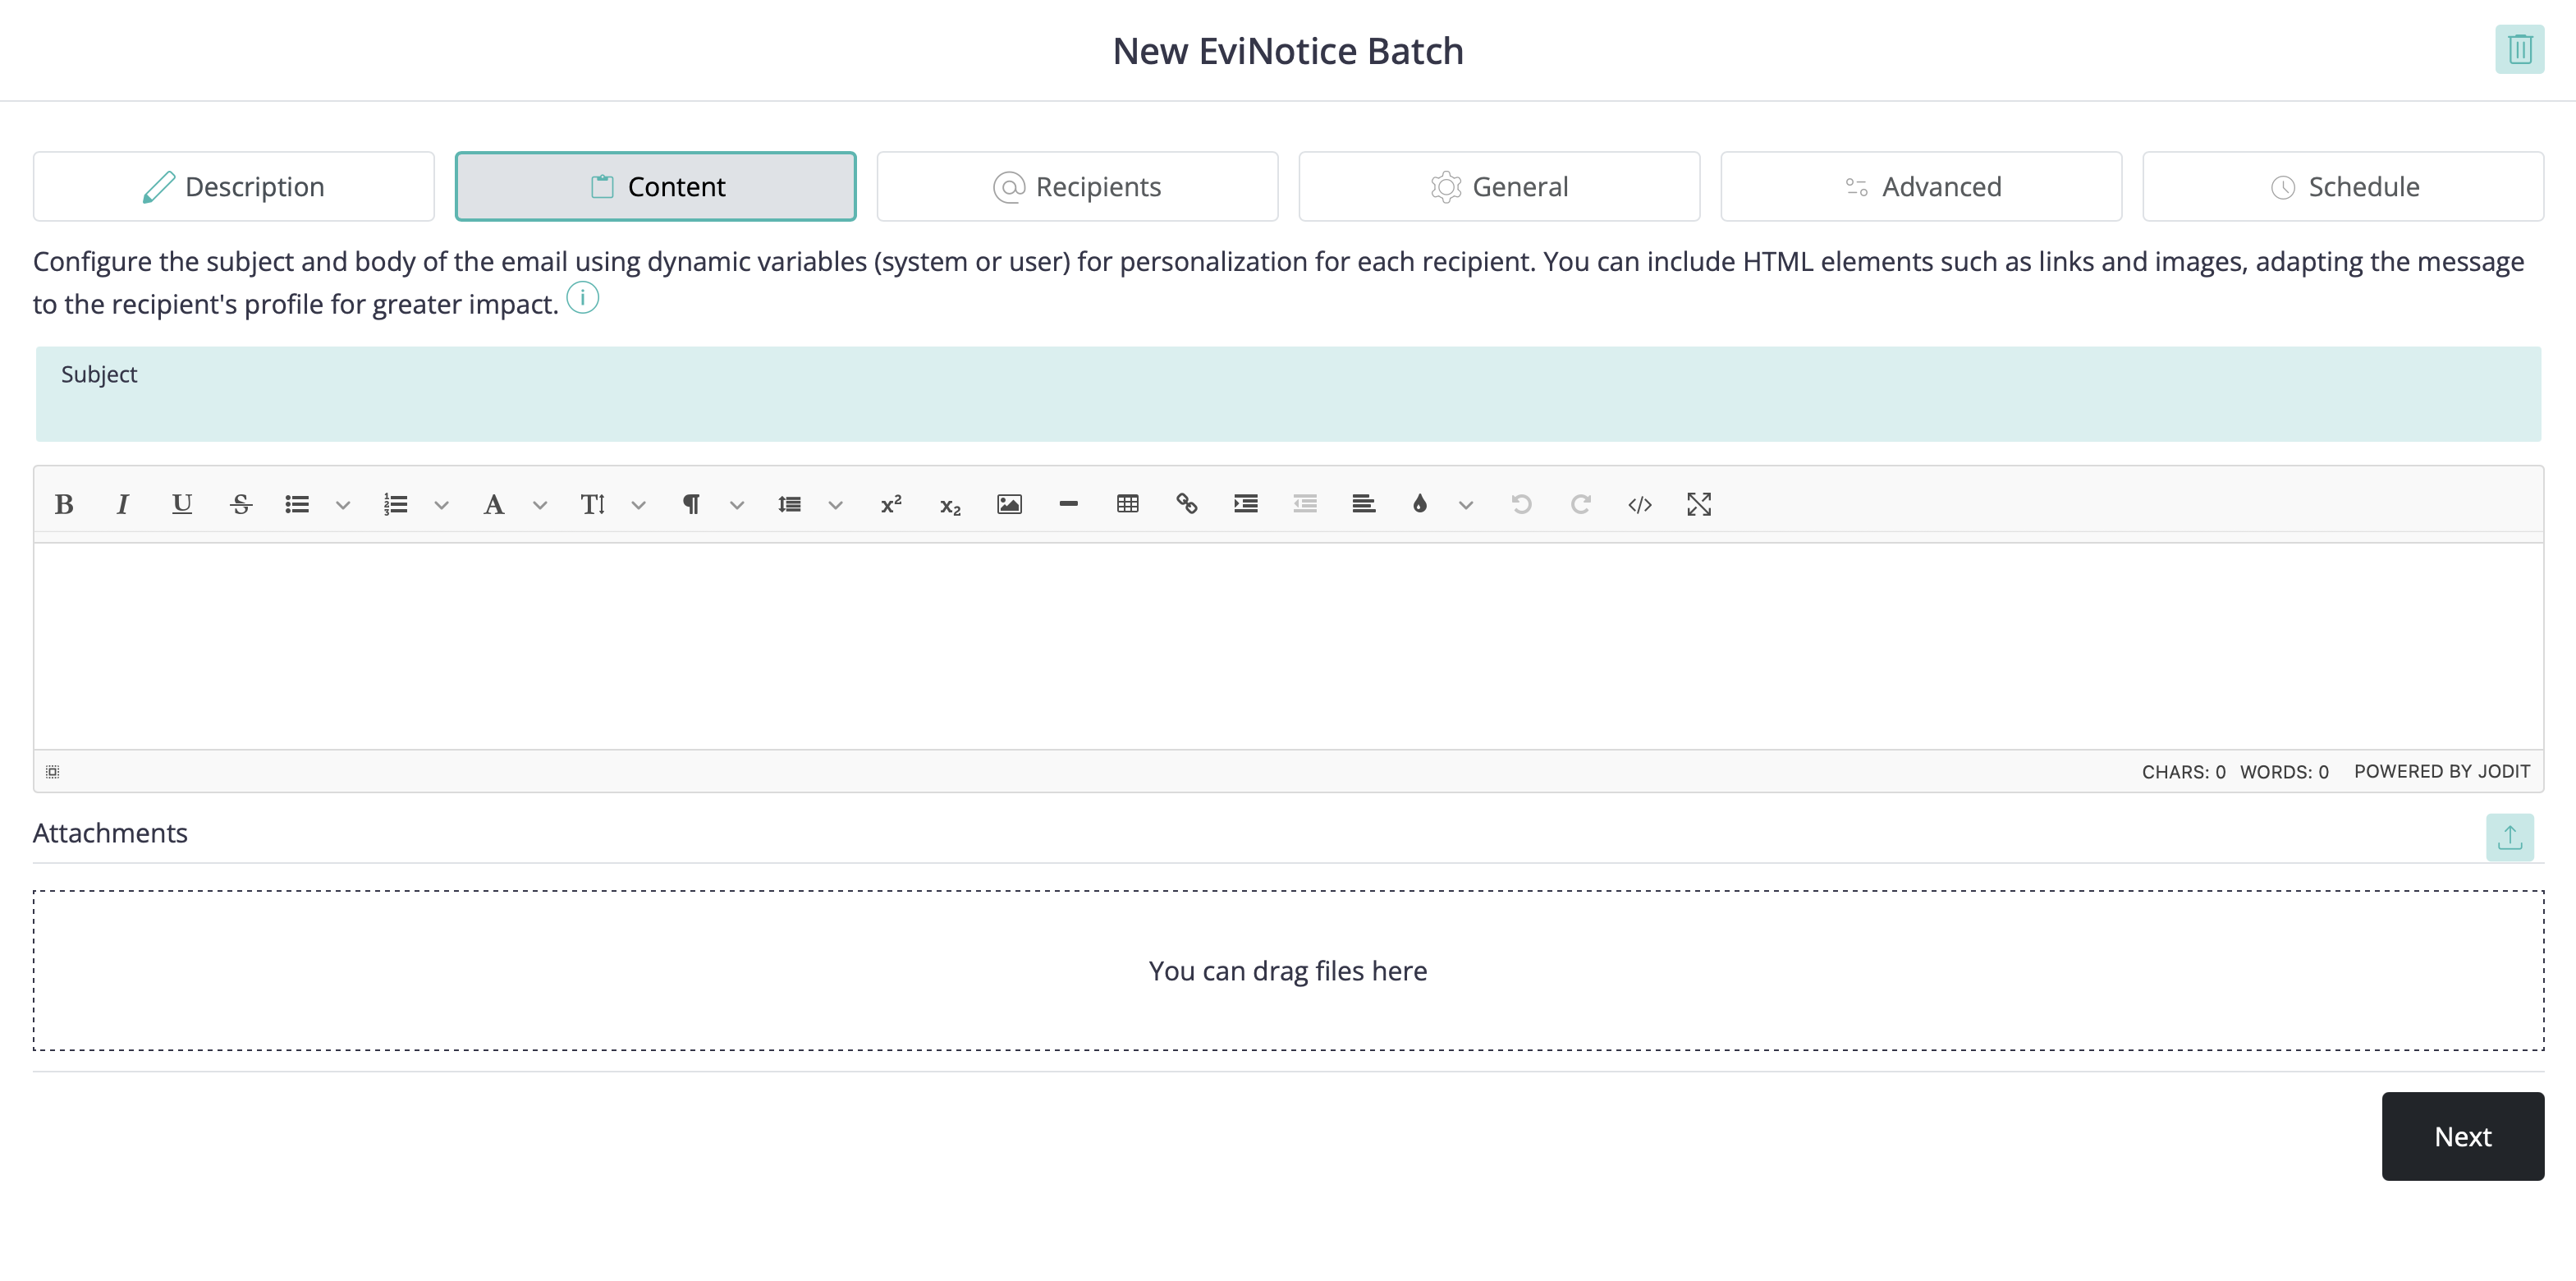
Key points in this step:
- The screen text explains that the subject and body can use dynamic variables, including system variables and user variables.
- The editor supports formatted content and can include HTML elements such as links and images.
- Files added in
Attachmentsare shared with the batch content configured in this step. - For
EviSMSbatches, the content is the message text rather than a subject plus rich-text body.
- Open
Recipients. - Select the
Delivery channel for the notification. - Choose how you want to add recipients.
- Add the recipients using one of the available methods.
- Click Next.
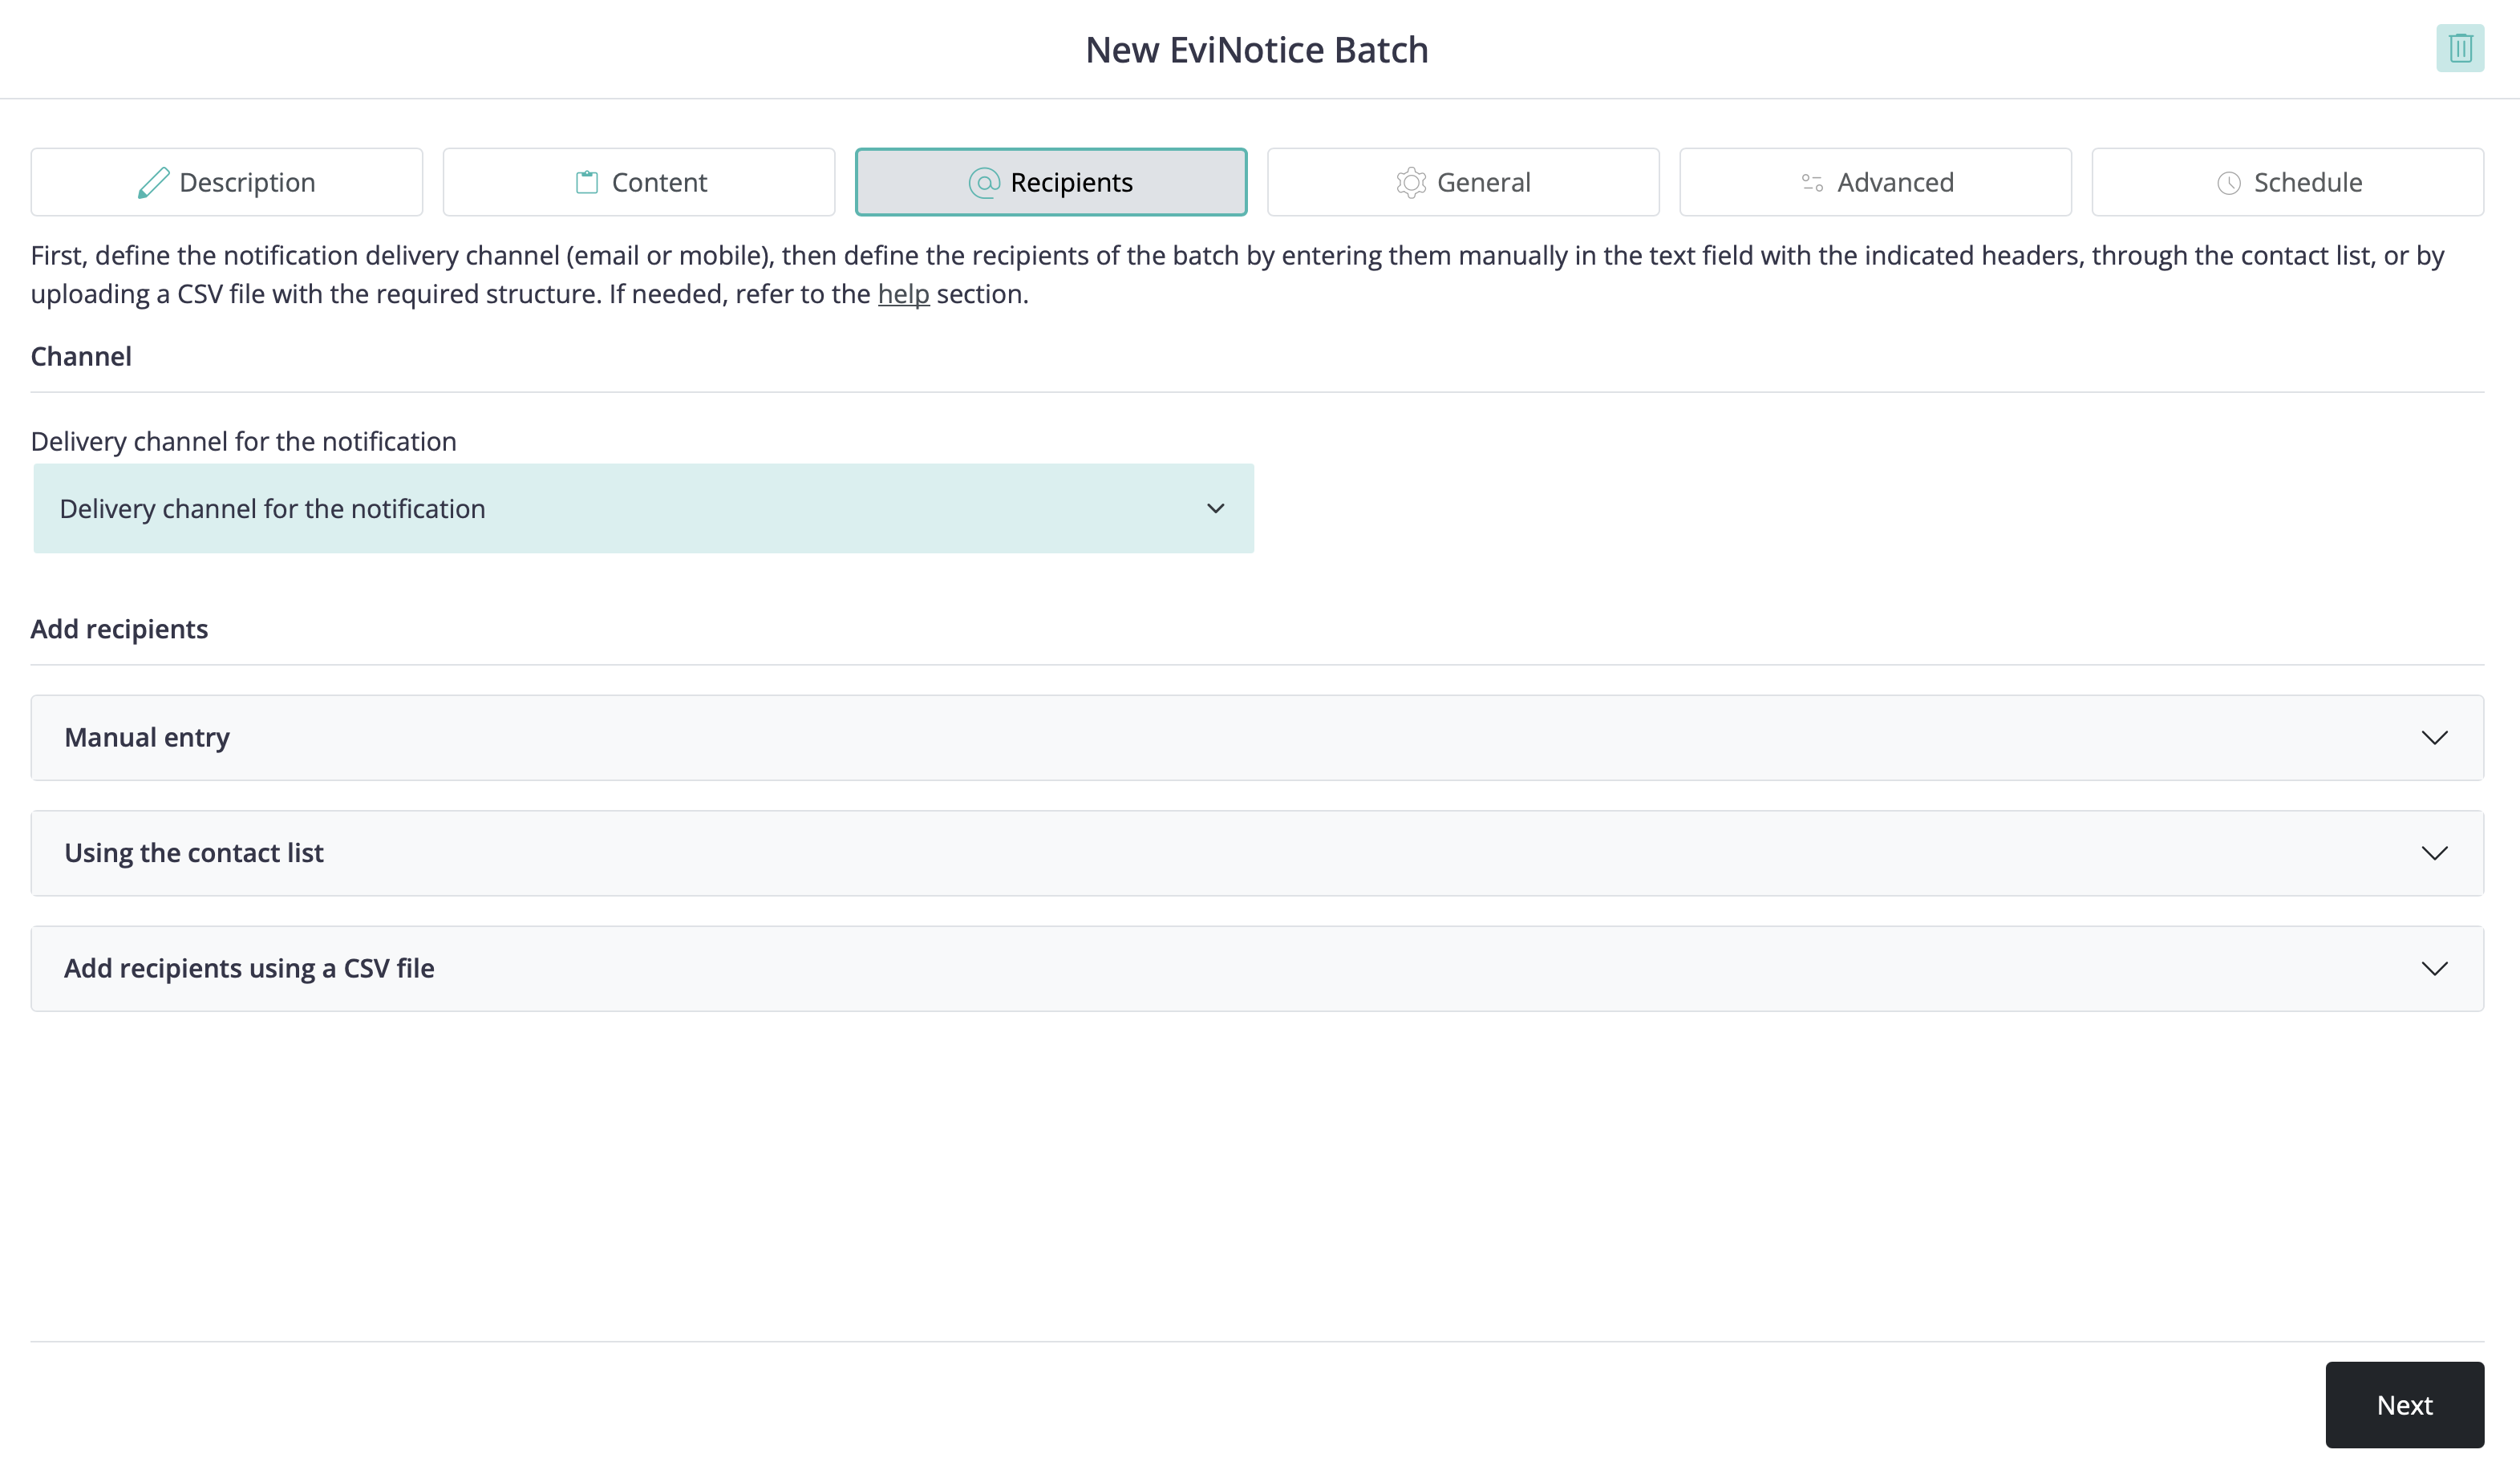
The screen shows these recipient-entry methods:
Manual entryUsing the contact listAdd recipients using a CSV file
Key points in this step:
- The wizard text states that you first define the notification delivery channel, such as email or mobile.
- In
Manual entry, recipients are entered in the text area using the indicated headers. - In
Using the contact list, recipients are selected from saved contacts. - In
Add recipients using a CSV file, recipients are loaded from a CSV file with the required structure. - CSV imports use
;as the column separator. - If needed, use the on-screen help referenced in this step.
For API and CSV-based batch imports, the required recipient columns depend on the service:
| Service | Mandatory CSV columns | Common optional columns |
|---|---|---|
EviNotice | address, legalname | lookupkey, displayname, custodychallenge, custodychallengeresponse, deliverychallenge, deliverychallengeresponse, deliveryotpchannel, deliveryotpaddress |
EviMail | emailaddress, legalname | lookupkey, displayname, evidenceaccesscontrolchallenge, evidenceaccesscontrolchallengeresponse |
EviSMS | phonenumber, legalname | lookupkey, evidenceaccesscontrolchallenge, evidenceaccesscontrolchallengeresponse |
Extra columns prefixed with *, such as *orderid, can be used as custom fields and are stored as recipient extra data.
- Open
General. - In
Basics, select theNotification language. - Select the
Appearance. - Set the
Tracking period (minutes). - In
Processing and Affidavits, select theCertification and security level. - Select the
Affidavit Language. - Review the selected
Affidavits. - In
Agreement possibilities, select the agreement mode you want to use. - Decide whether to enable
Comments are allowed. - Enter
Reasons for acceptanceif your process uses them. - Enter
Reasons for rejectionif your process uses them. - Decide whether to enable
Reason for acceptance required. - Decide whether to enable
Reason for rejection required. - Decide whether to enable
Allow notification refusal. - Click Next.
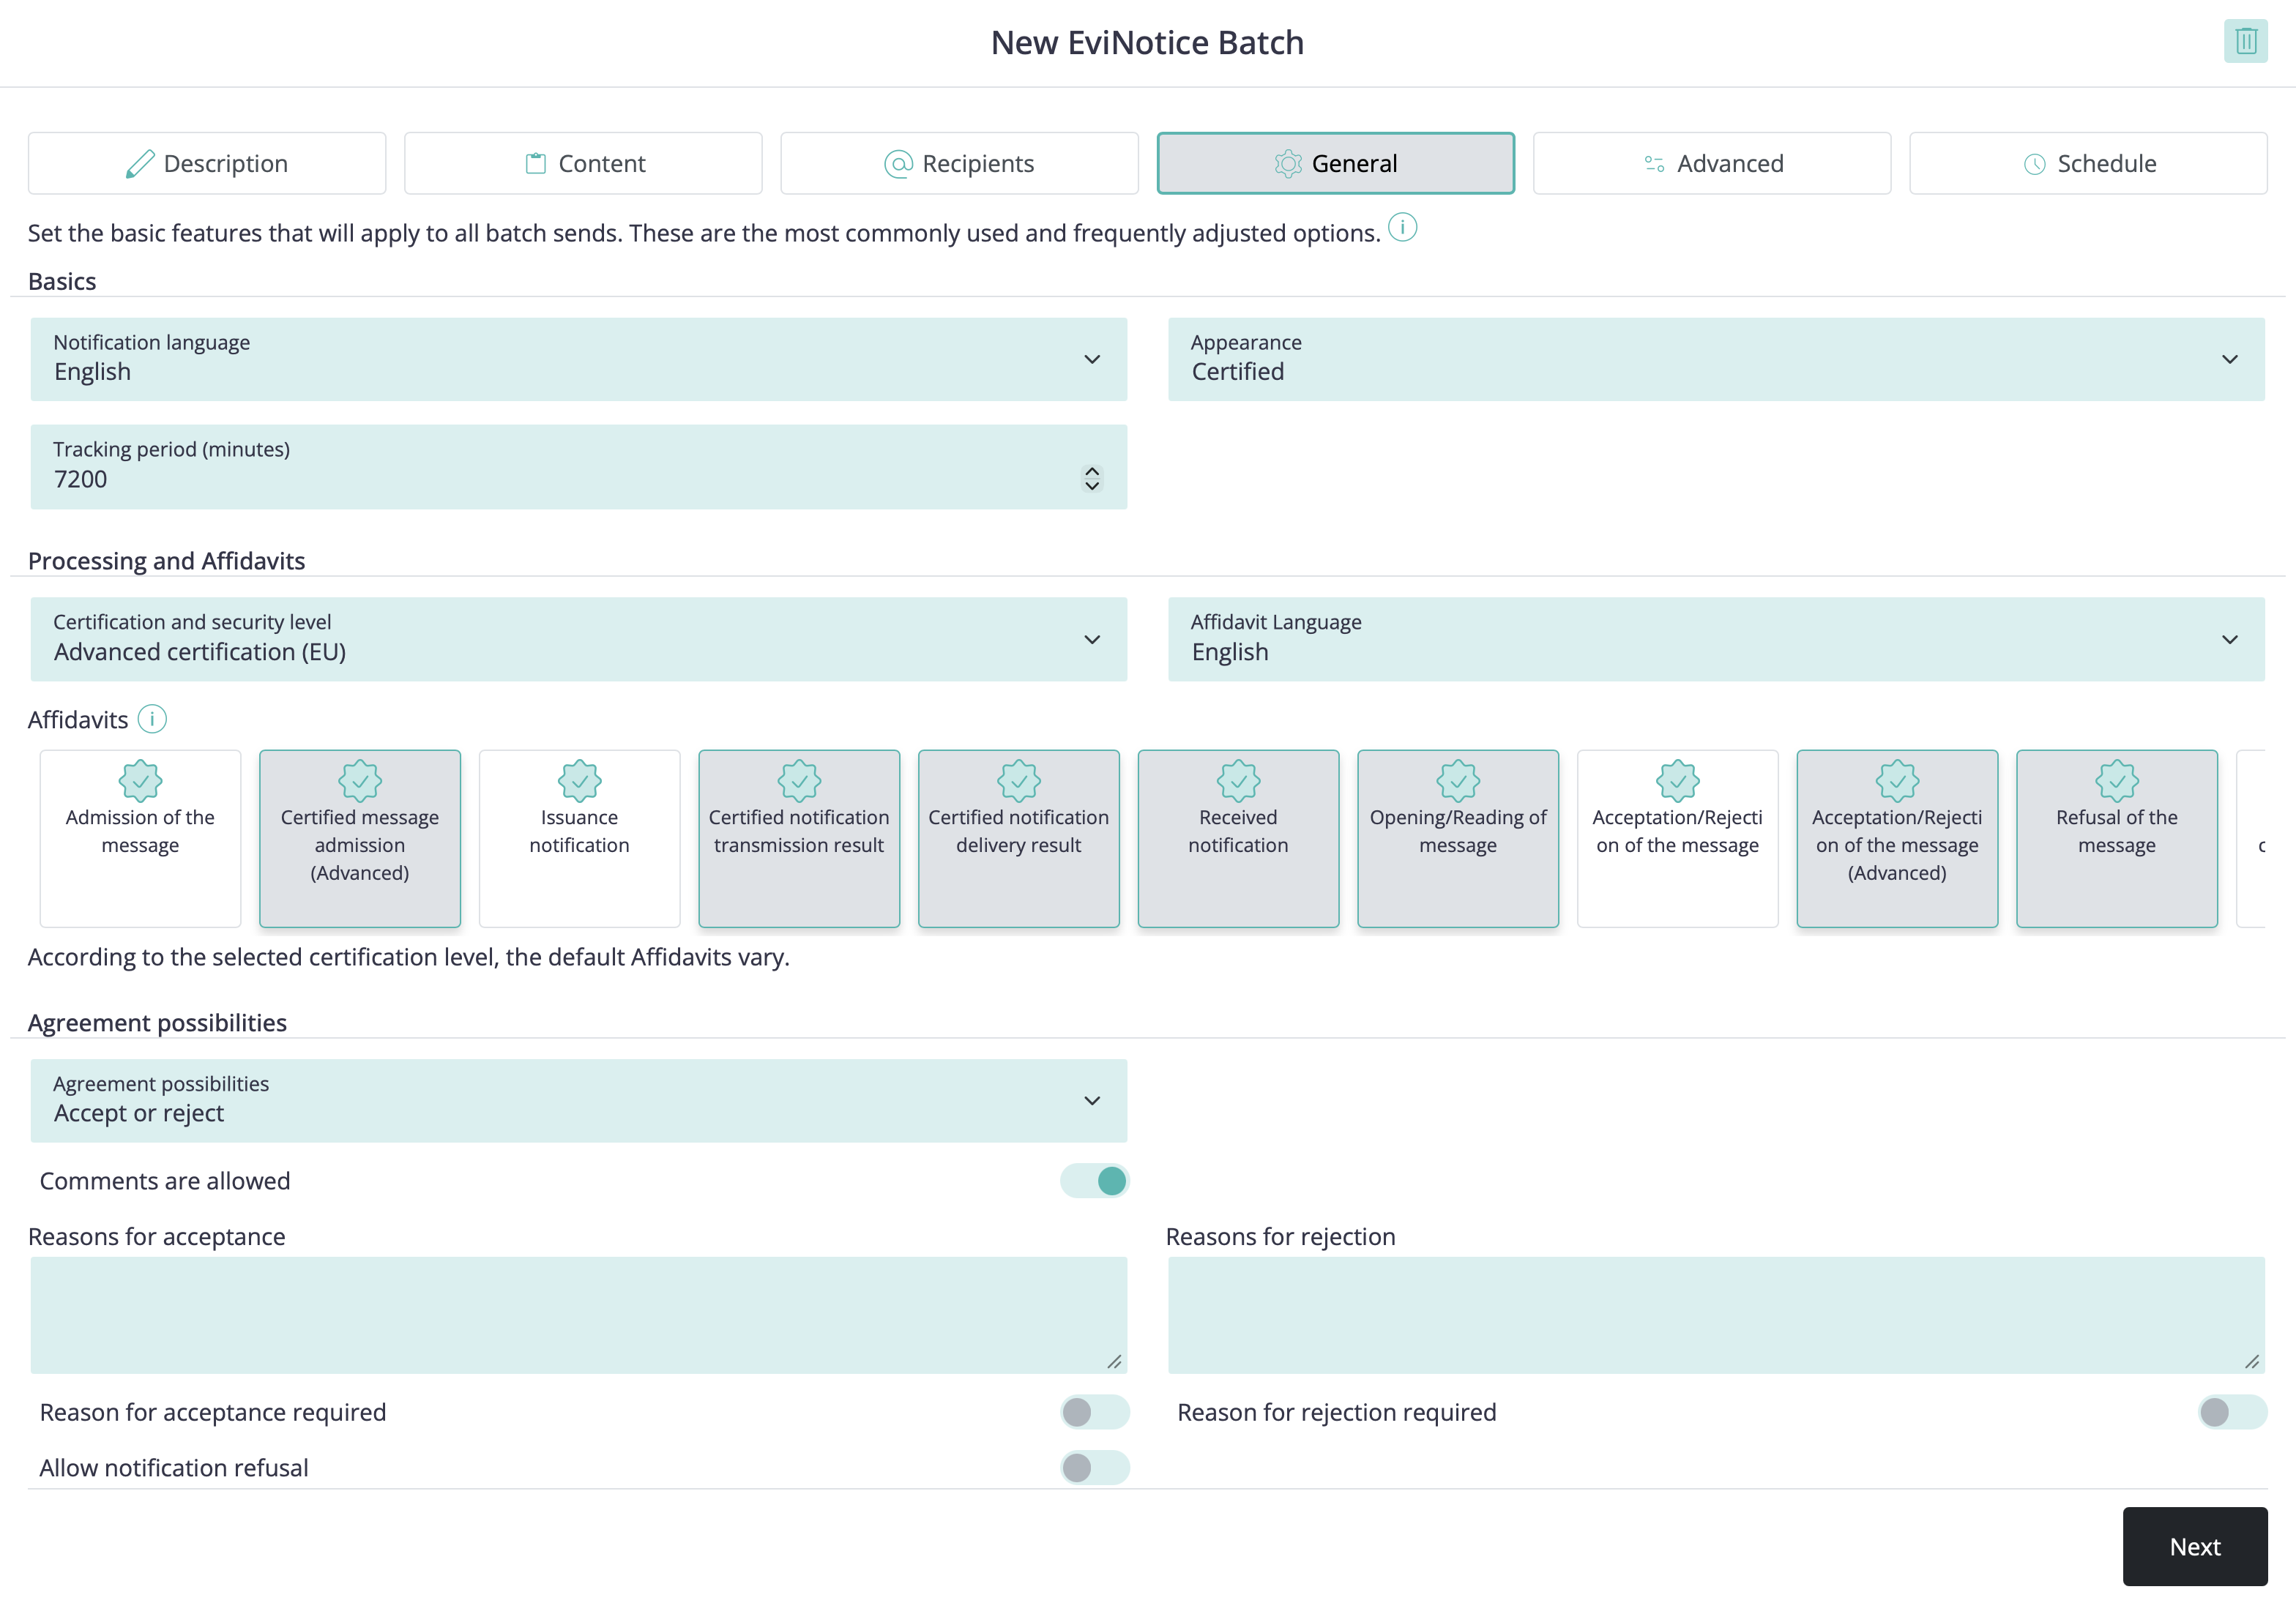
Key points in this step:
- The screen says these are the basic features shared by all sends in the batch for the EviNotice example shown here.
- The selected certification level affects the default affidavits shown in the
Affidavitscards. Agreement possibilitiescontrols whether recipients can accept, reject, or do both in services that support recipient-interaction options.- The comments and reason fields apply to the recipient interaction model used by the batch when those options are available.
For more detail on generated evidence and affidavit kinds, see Evidence and affidavits.
- Open
Advanced. - In
Sender information, selectEmail to use as sender. - Enter
Reply-To email headerif replies should go to a specific mailbox. - Decide whether to enable
Do not send the Sender header in notification emails. - In
Filters for Push Notifications, enterUrl for event notificationif your process uses callbacks. - Decide whether to enable
Enable push notifications. - Select the push-notification events you want to receive.
- In
Other data, select theCost Centre. - Select the
Notification templateif your environment uses templates. - Click Next.
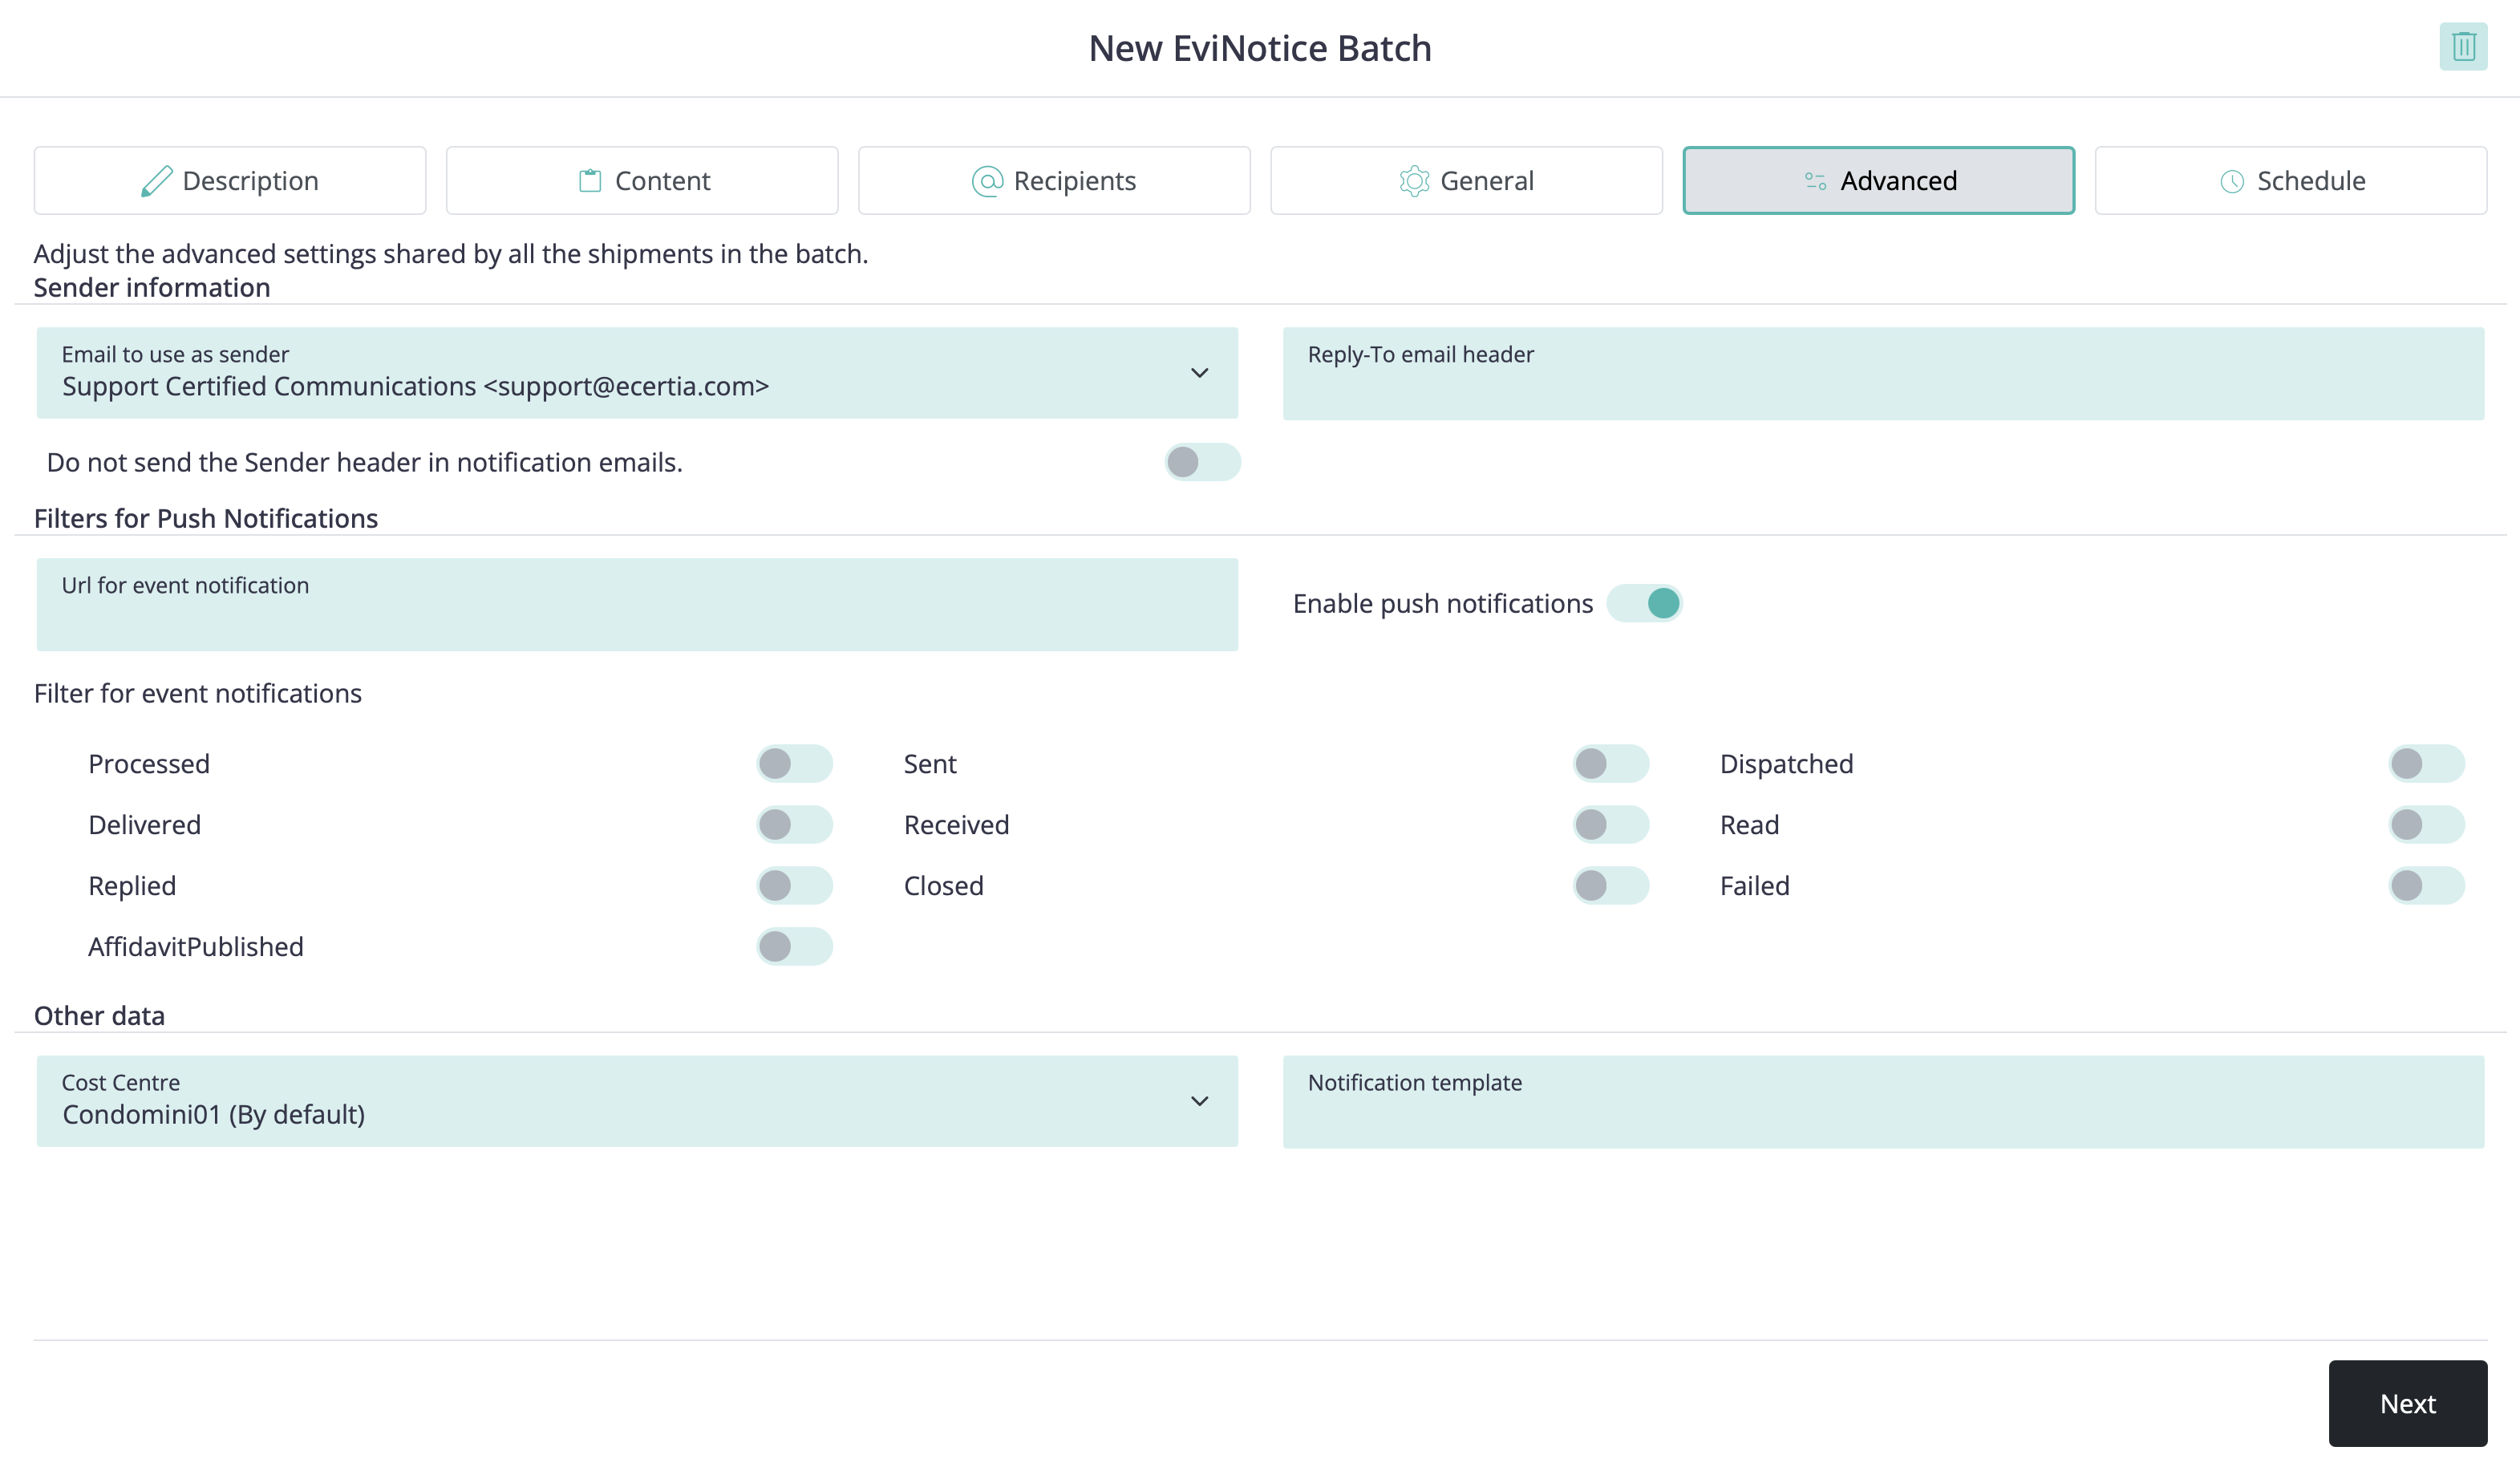
The push-notification filter list shown in the wizard includes these events:
ProcessedDeliveredRepliedAffidavitPublishedSentReceivedClosedDispatchedReadFailed
Key points in this step:
- The screen states that these settings are shared by all shipments in the batch.
- The sender fields define how the batch notifications are sent.
- The callback URL and event filters are propagated to the evidences generated from the batch. They do not push the batch object's own lifecycle.
Cost CentreandNotification templateare shared settings applied across the batch.
- Open
Schedule. - Decide whether the batch should run immediately or at a specific date and time.
- If you want to schedule it, set
Schedule dateandSending time. - If you want immediate execution, enable
Process now. - Click Finish.
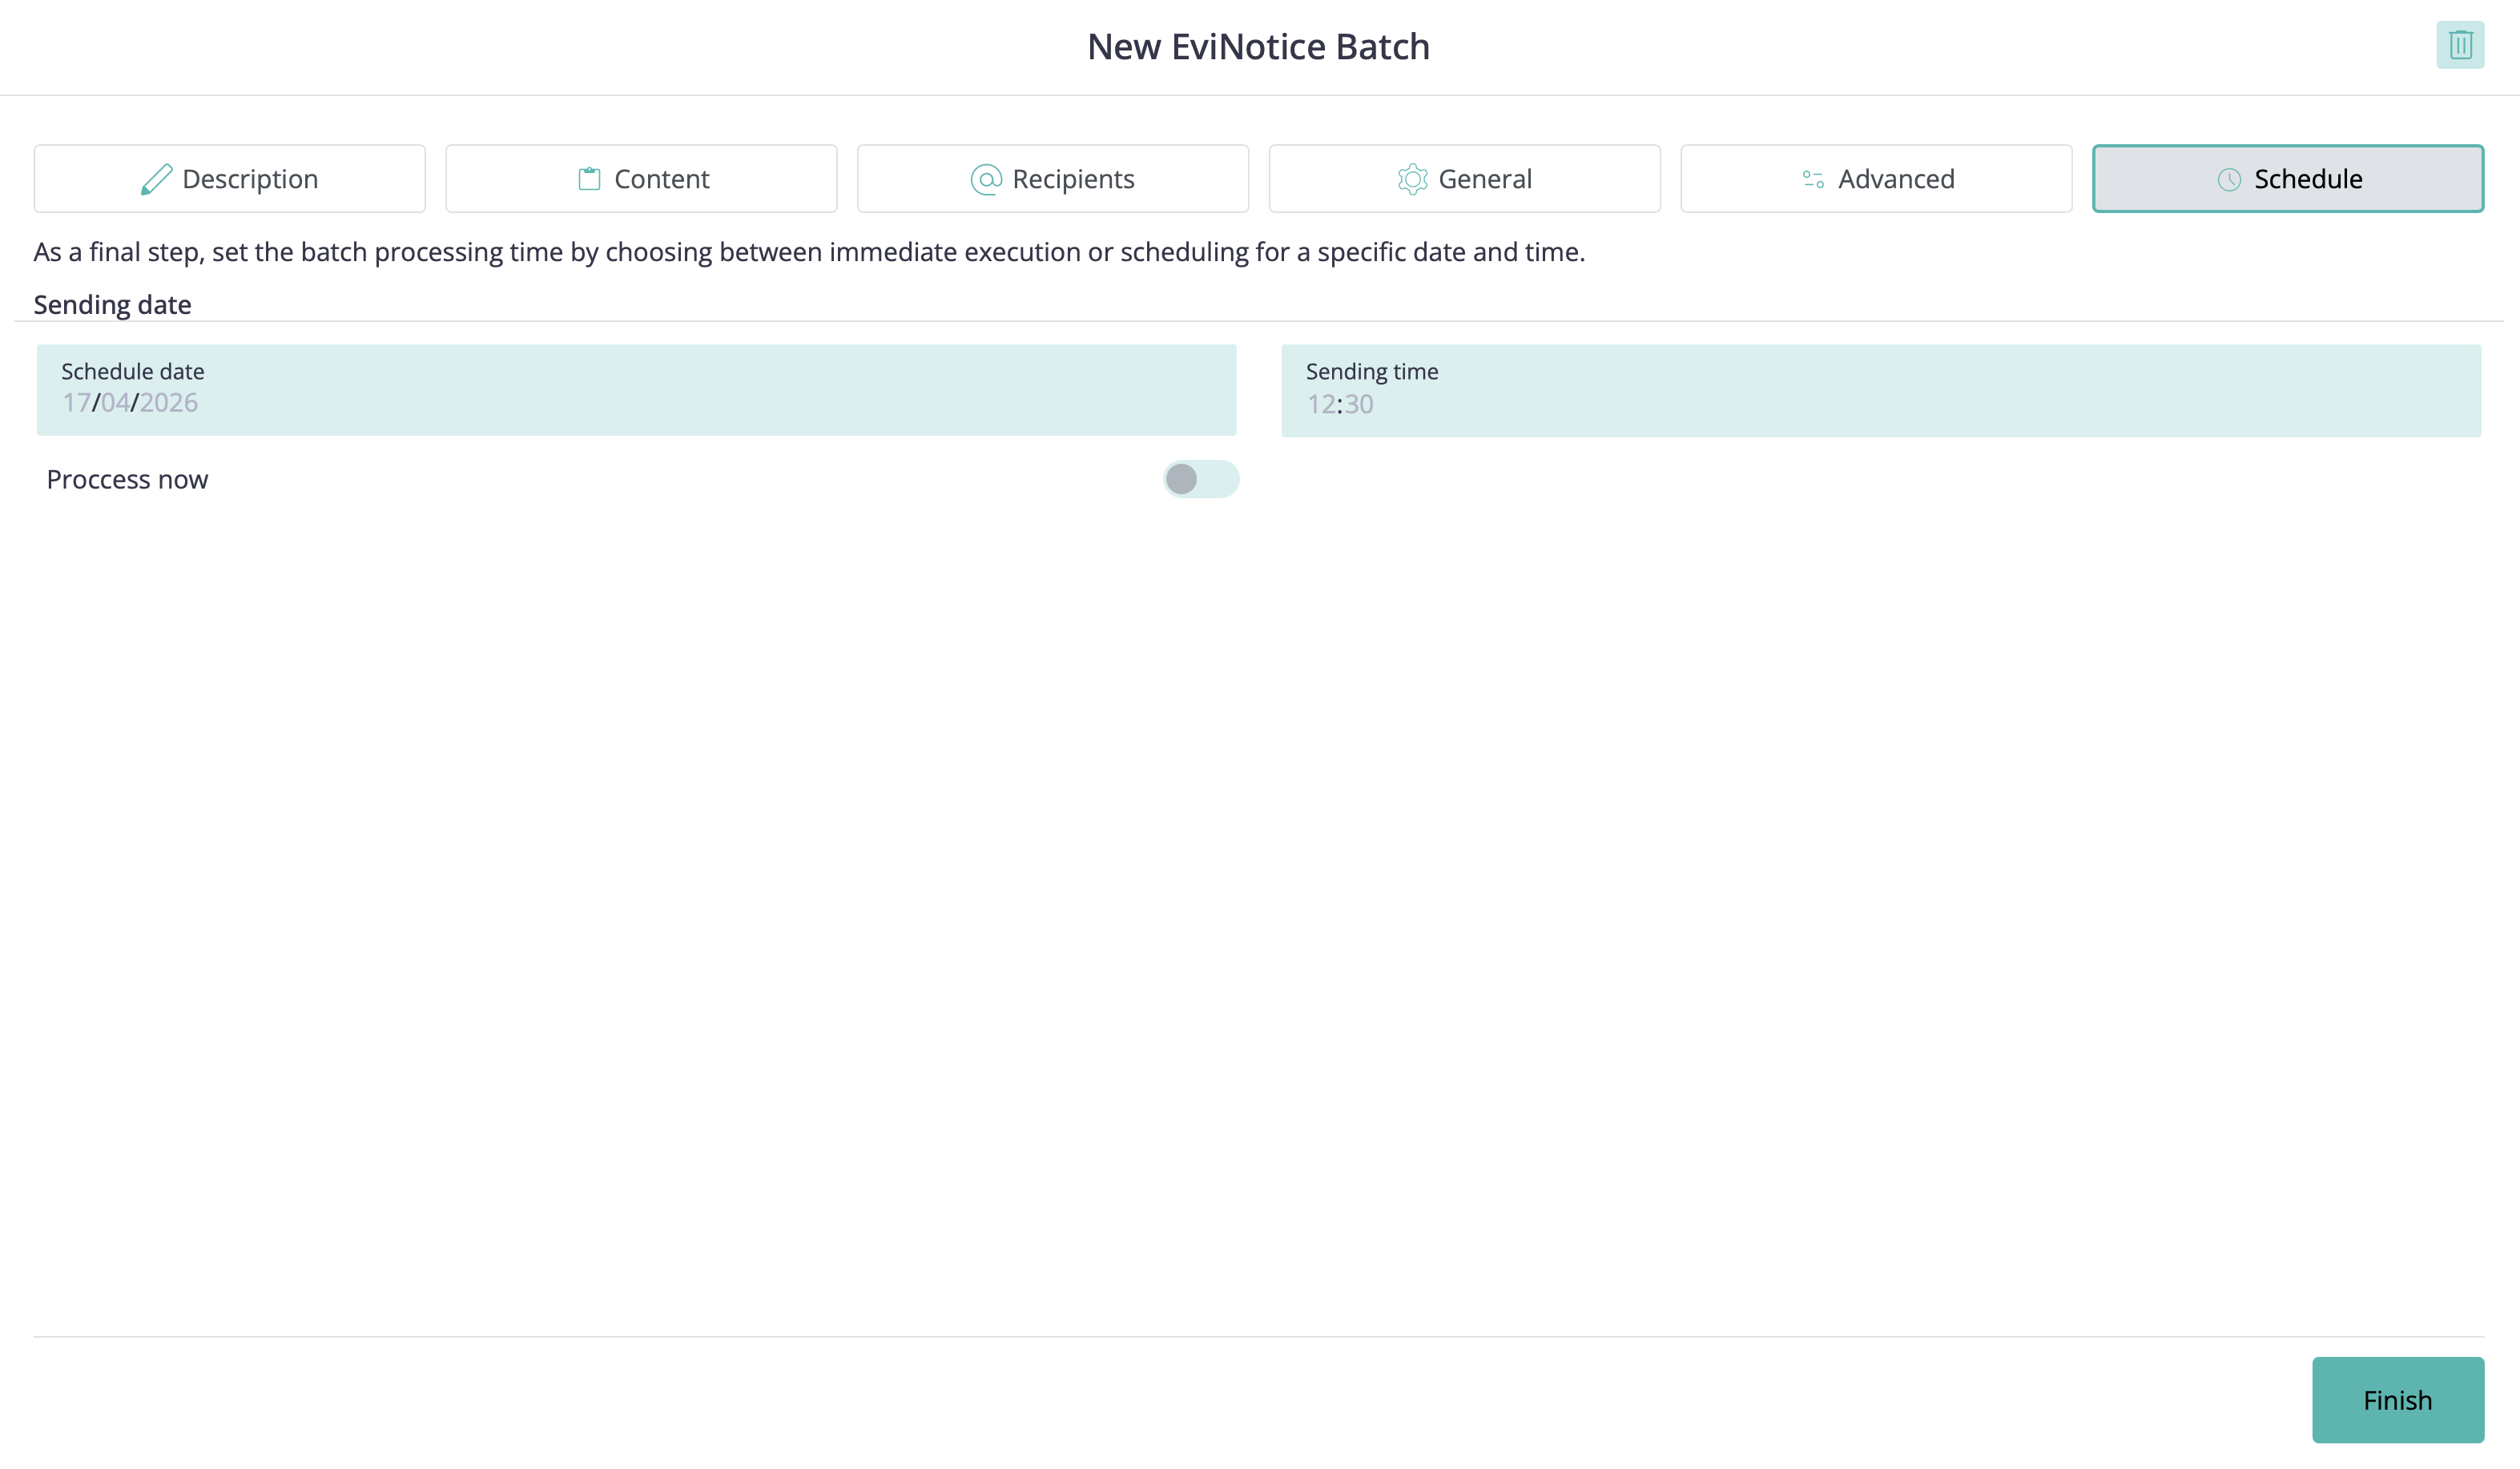
The screen text explains that this final step is used to choose between immediate execution and scheduled execution.
Namirial Notify creates the batch with the configured content, recipients, shared settings, and schedule. The batch is then ready to run immediately or at the selected time, according to the option chosen in the final step.
If push notifications are enabled, generated evidences can send the normal per-evidence callbacks for the selected events. Track the batch itself from the batch list or details view.
Use the batch list when you need to check whether a batch is still editable, scheduled, processing, processed, invalid, or failed.
- Sign in to Namirial Notify.
- Open the service area for the batch, such as
My EviNotice batches,My EviMail Batches, orMy EviSms Batches. - Search or filter the list using the information you have, such as the batch description, creation date, scheduled date, or state.
- Open the batch row or select Details if that action is available.
- Review the batch state, progress, and totals, including sent and failed item counts when the batch has started processing.
- Review the recipient or item list to identify which entries were processed into evidences and which entries failed validation or processing.
- Open the generated evidence from the relevant transaction list when you need the final delivery, opening, reply, closure, or affidavit status for a recipient.
Batch progress reports whether batch items were processed into evidences. It does not replace the transaction status of each generated EviNotice, EviMail, or EviSMS.
A batch has its own processing lifecycle, separate from the lifecycle of the evidences created from its recipients. Batch items also have their own state progression.
Batch-level states
Invalid usually means the batch configuration or recipient data must be corrected before the batch can continue. Failed means processing failed after the batch was submitted or started; review the error details and follow your operational recovery process.
Per-item states
Each recipient or item in a batch moves through its own item-level lifecycle. The Sent item state means that the item was successfully processed into an evidence, not that the final evidence was delivered to the recipient.
Problem: The wizard does not let you continue after completing a step.
Cause: One or more required fields in the current step may still be empty or invalid.
Solution:
- Review the fields in the active step.
- Confirm that all required values were entered.
- Check the page for validation messages and correct the reported issue.
- Try the step action again, such as Create or Next.
Problem: The Recipients step does not accept the entered data or the uploaded CSV file.
Cause: The delivery channel, headers, or file structure may not match the format expected by the wizard.
Solution:
- Confirm that the correct
Delivery channel for the notificationwas selected first. - For manual entry, review the indicated headers shown by the wizard.
- For CSV import, confirm that the file follows the required structure.
- Use the on-screen help in the
Recipientsstep if you need the expected format.
Problem: The batch is configured, but Finish does not complete the process.
Cause: The schedule settings or one of the previous shared settings may still be incomplete or invalid.
Solution:
- Review the
Schedule date,Sending time, andProcess nowsettings. - Confirm that the previous steps were completed successfully.
- Return to the earlier wizard steps if needed and correct any missing data.
- Retry Finish after the reported issue is resolved.
Problem: The batch list or details view shows the batch as Invalid or Failed.
Cause: The batch may contain invalid configuration, invalid recipient data, or a processing error detected after submission.
Solution:
- Open the batch details view.
- Review the validation or failure information shown for the batch and its items.
- Correct the configuration or recipient data if the batch is still editable.
- If the batch is no longer editable, create a corrected batch or follow your operational recovery process.
- Issuer User Manual
- Contacts
- How to create a new EviNotice
- Evidence and affidavits
- States and outcomes
- Callbacks and webhooks
If you are integrating batch sending programmatically, see the batch operations sections in the service API references: