Correct IP and time configuration are mandatory prerequisites for a compliant Timestamping Authority (TSA) deployment.
SmartTSA provides dedicated administrative sections for:
- Network configuration (IP settings)
- Time synchronization configuration (NTP servers)
These configurations are typically performed:
- During initial setup
- Before enabling timestamping services
- Whenever network or infrastructure changes occur
The IP configuration section allows administrators to define all network parameters required for the SmartTSA appliance to operate correctly.
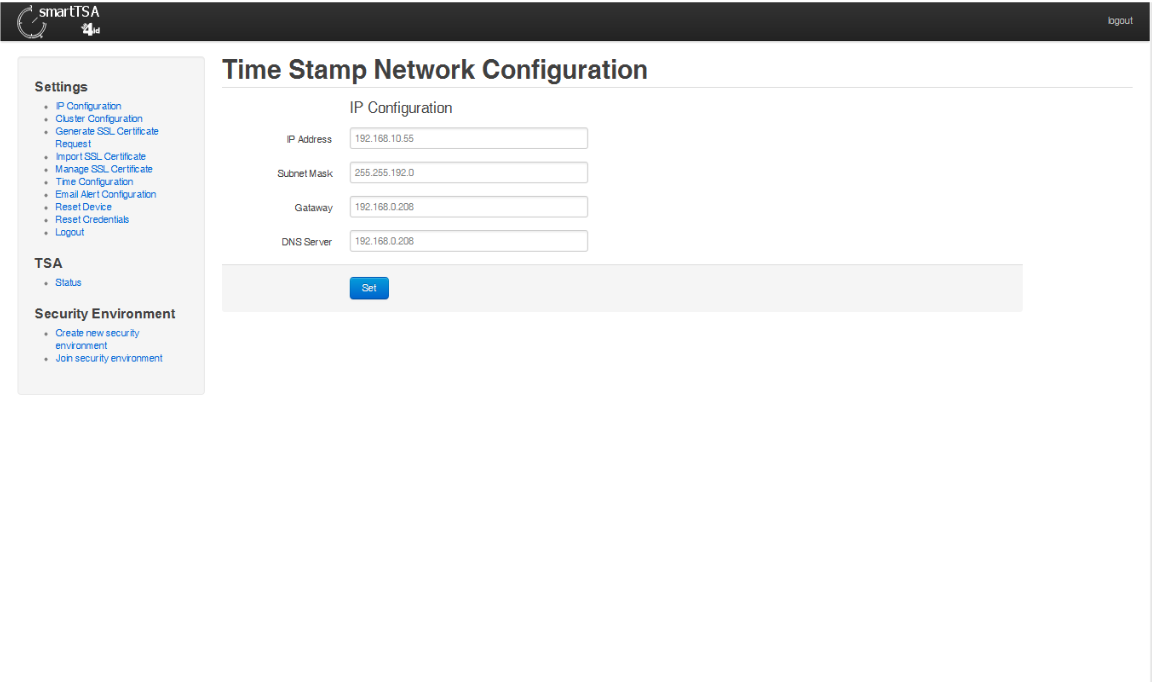
Proper network configuration ensures:
- Appliance reachability
- Cluster connectivity (in HA environments)
- Secure administrative access
- Correct client communication
To configure network settings:
- Log in to the SmartTSA Administrative Console
- From the left navigation menu, select:
IP configurationThe administrator can then set all required network parameters.
Although specific fields may depend on deployment, network parameters generally include:
- Appliance IP address
- Netmask
- Default gateway
- DNS servers
- Cluster-related addresses (if HA enabled)
⚠️ Incorrect IP configuration may prevent access to the appliance.
Accurate time is essential for a Timestamping Authority.
All timestamps issued by SmartTSA must rely on:
- Trusted and synchronized system time
- Minimal deviation from official time sources
Failure in time synchronization may cause:
- Invalid timestamps
- Compliance violations
- Audit issues
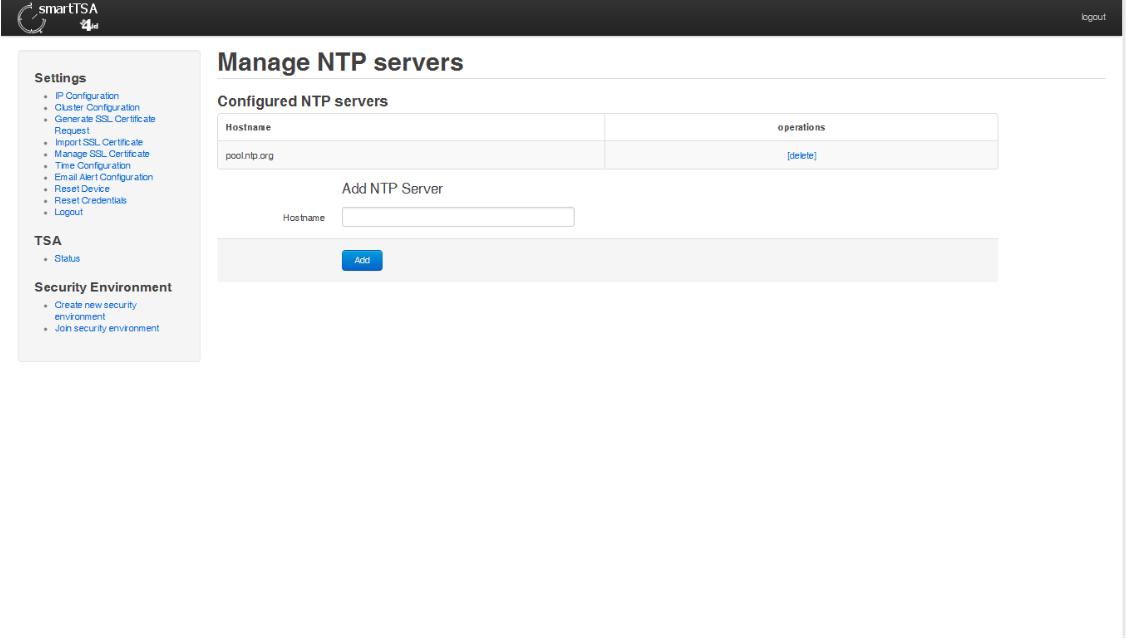
SmartTSA supports configuration of one or more NTP servers.
NTP servers are used to:
- Synchronize appliance clock
- Reduce time drift
- Guarantee timestamp accuracy
To manage NTP servers:
- Log in to the Administrative Console
- Select the menu option:
Time ConfigurationA list of configured NTP servers is displayed.
From the Time Configuration page, administrators can:
- Add a new NTP server
- Remove an existing NTP server
- Review the current synchronization status
Best practice is to configure multiple redundant NTP sources.
Example:
- ntp1.company.local
- ntp2.company.local
- pool.ntp.org (only if allowed by policy)
To ensure correct time synchronization:
- Use trusted internal or certified time sources
- Configure at least two NTP servers for redundancy
- Monitor estimated synchronization error regularly
- Avoid using unreliable public servers in regulated environments
If NTP synchronization fails:
- Verify network connectivity to the NTP servers
- Ensure firewall rules allow NTP traffic (UDP port 123)
- Check that server addresses are correct
- Review dashboard NTP status indicators
Before enabling TSA services, confirm:
- Network settings are correct and documented
- Appliance is reachable via IP/DNS
- NTP servers are configured and operational
- Time deviation is within acceptable limits