This is the section where you can view all identities, and therefore all certificates and connected devices.
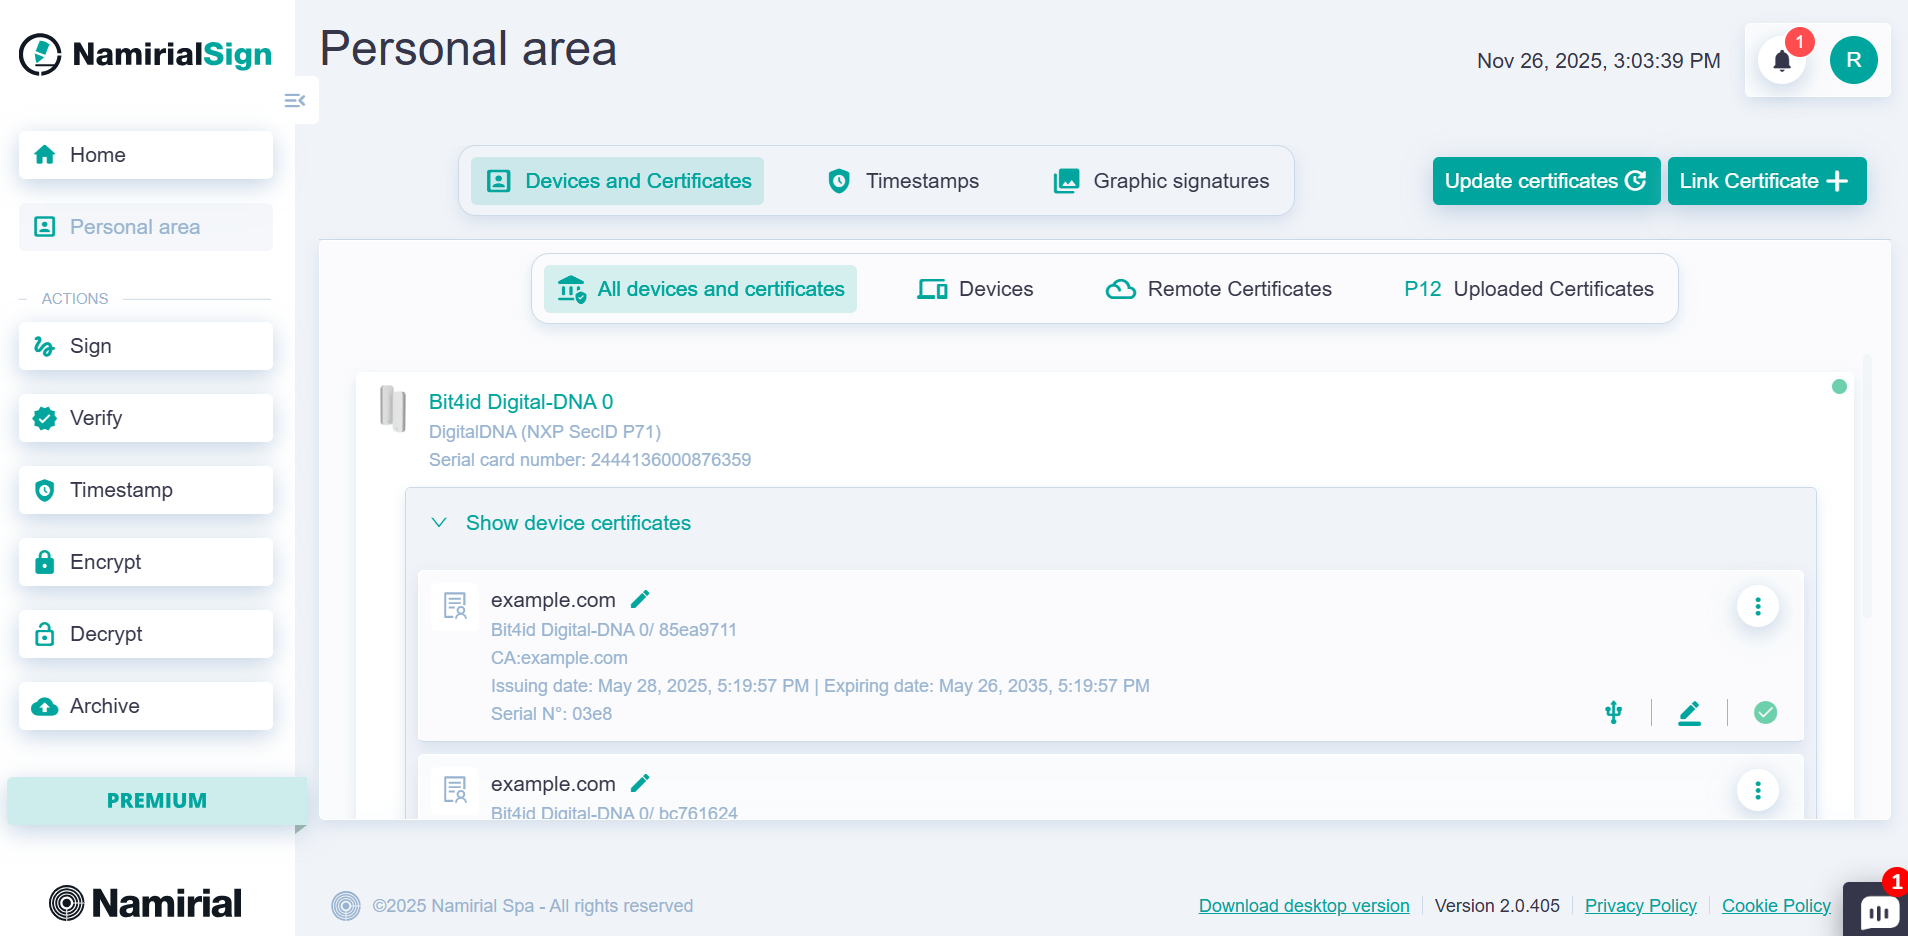
For each certificate, you can immediately recognize the type and origin:
| Icon | Functionality |
|---|---|
| Remote certificate: indicates that the certificate comes from an online account, such as a remote signature or electronic seal. | |
| Local certificate: indicates that the certificate comes from a device connected via USB (token or smartcard). | |
| P12 | Certificate from file: indicates that the certificate was imported into your profile from a password-protected file. |
| System certificate: indicates that the certificate comes from the operating system. | |
| Signature certificate: indicates that the certificate can be used to perform a qualified signature with legal validity. | |
| Authentication certificate: Indicates that the certificate can be used for authentication via client authentication on browsers. |
You can add in this section:
- local certificates (on physical device);
- remote certificates (available online);
- certificates from file (.p12 files). and update certificates with the appropriate button to detect any changes in terms of renewals and revocations.
To add a new remote certificate, automatic signature, or electronic seal, click the "Associate certificate +" button and select "Remote certificate". A screen will appear where you can select the issuer and then enter the credentials required.
At the end of the entry, press the "Confirm" button, the configuration is complete and you can use the identity in the next signature.
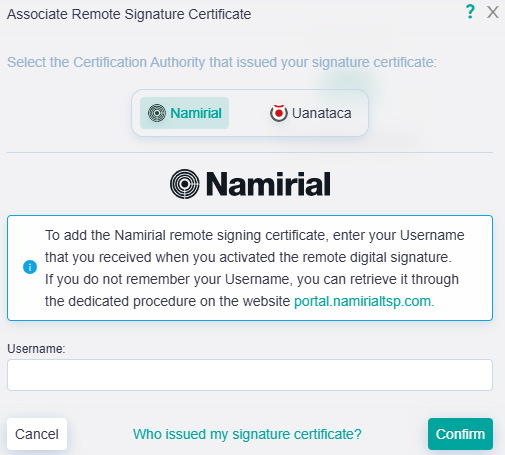
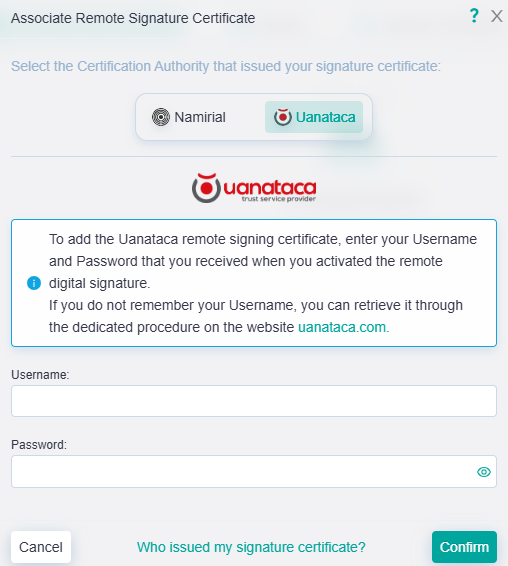
To understand which issuer you should choose, please refer to the email you have received during the purchase.
In case of Namirial remote certificates, you should have received an email from no-reply@namirial.com, the subject should look like EMISSIONE DISPOSITIVO DI FIRMA DIGITALE / ISSUANCE OF DIGITAL SIGNATURE DEVICE.
In case of Uanataca remote certificates, the sender should be noreply@uanataca.com, the subject can be Uanataca - il tuo certificato è stato generato or Uanataca - Enhorabuena, su certificado ha sido generado.
If you want to add a .p12 file, click the "Associate certificate +" button and select "P12 Certificate". A screen will appear where you can select the .p12 file on your computer and enter the file password.
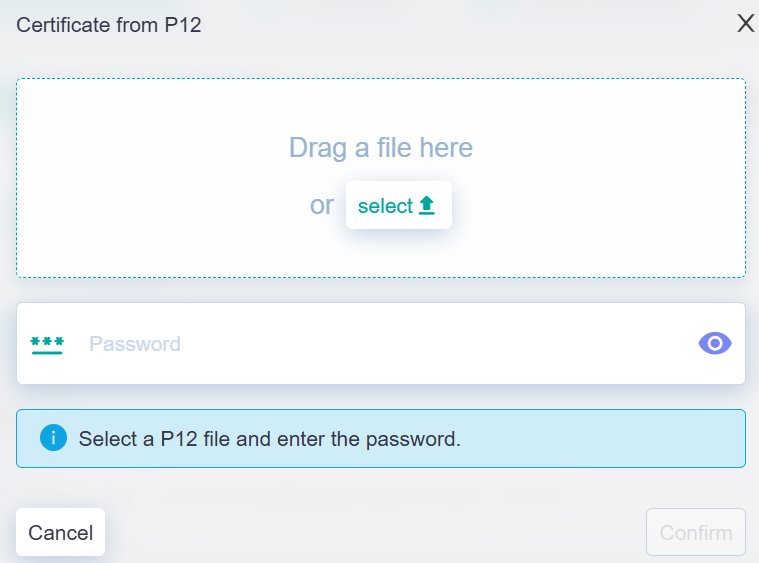
At the end of the operation, the identity will be present within Namirial Sign.
In addition to the previous signature certificates, you can view local certificates, i.e., those present on a physical device (smartcard or token). No interaction with the software is necessary, just insert the token into the PC or the smartcard into a reader and all certificates on board will be automatically displayed.
For each type of certificate, you can perform certain actions by clicking on the menu related to the desired certificate.
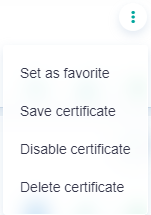
For a remote certificate:
- "Set as favorite" sets the current certificate as the one that will always be preselected in the signing flow;
- "Save certificate" allows you to save the public certificate on your PC in .cer format;
- "Disable certificate" is the function that allows you to keep the certificate in the personal area but not display it among the possible signing and encryption certificates; however, if there is an encrypted file that can be decrypted by that certificate, it will still be possible to use it for the decrypt function.
- "Delete certificate" is used to remove the certificate from the list.
For a .p12 file certificate:
- "Set as favorite" sets the current certificate as the one that will always be preselected in the signing flow;
- "Save certificate" allows you to save the public certificate on your PC in .cer format;
- "Disable certificate" is the function that allows you to keep the certificate in the personal area but not display it among the possible signing and encryption certificates; however, if there is an encrypted file that can be decrypted by that certificate, it will still be possible to use it for the decrypt function.
- "Delete certificate" is used to remove the certificate from the list.
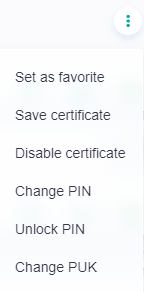
For a local certificate:
- "Set as favorite" sets the current certificate as the one that will always be preselected in the signing flow;
- "Save certificate" allows you to save the public certificate on your PC in .cer format;
- "Disable certificate" is the function that allows you to keep the certificate in the personal area but not display it among the possible signing and encryption certificates; however, if there is an encrypted file that can be decrypted by that certificate, it will still be possible to use it for the decrypt function.
- "Change PIN" is the function that allows you to change the PIN of the device containing the selected identity;
- "Unlock PIN" is the function that allows you to unlock and choose a new PIN using the PUK of the device containing the selected certificate;
- "Change PUK" is the function that allows you to change the PUK of the device containing the selected certificate.
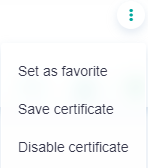
For a system certificate:
- "Set as favorite" sets the current certificate as the one that will always be preselected in the signing flow;
- "Save certificate" allows you to save the public certificate on your PC in .cer format;
- "Disable certificate" is the function that allows you to keep the certificate in the personal area but not display it among the possible signing and encryption certificates; however, if there is an encrypted file that can be decrypted by that certificate, it will still be possible to use it for the decrypt function.
Below are examples of menus for the four types of associated identities:

Clicking "Disable Certificate" hides the selected certificate, so that it is not displayed during signing and encryption. To restore its visibility, click the "Enable certificate" button.

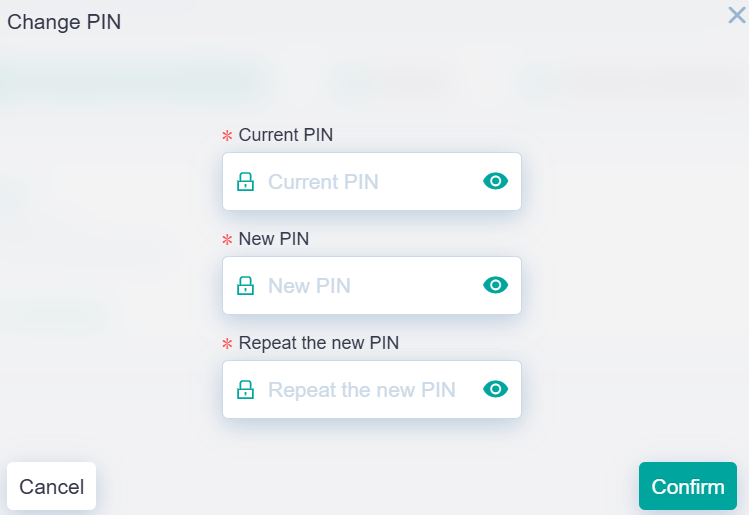
Clicking the "Change PIN" button allows you to change the PIN code by entering the current PIN and the new chosen PIN in the appropriate text boxes, confirming the latter a second time.
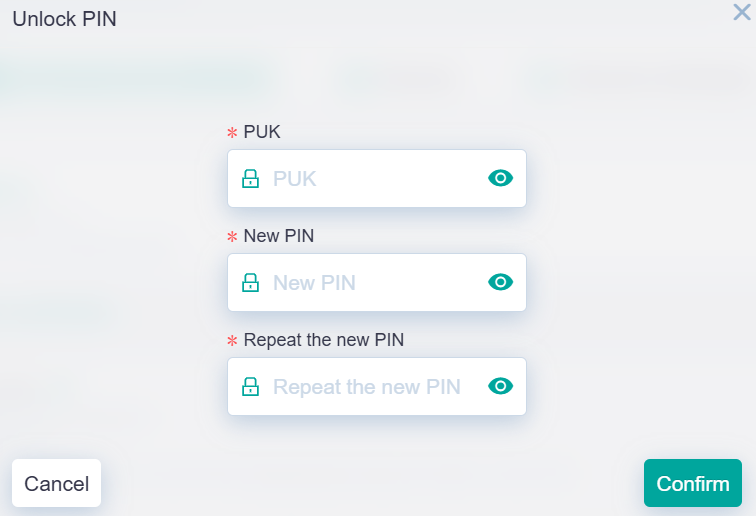
Clicking the "Unlock PIN" button allows you to reset the PIN code if it has been lost or blocked after too many incorrect entry attempts. This is done by entering the PUK code and the new PIN in the appropriate boxes, confirming the latter a second time.
Clicking the "Change PUK" button allows you to change the PUK code by entering the new chosen PUK and the current PUK in the appropriate text boxes, confirming the latter a second time.

Clicking the pencil icon to the right of the certificate name allows you to give it an alias, i.e., an alternative name to display when selecting the certificate during signing and encryption.

