This guide explains how report-enabled users request transaction reports from Namirial Notify. Use it when you need to export filtered evidence data from a transaction list for operational review, reconciliation, or periodic reporting.
Reports are available only when the feature is enabled for your tenant. Users must also have the ReportAdmin role to request or schedule reports.
- you are signed in to Namirial Notify
- report generation is enabled for your tenant
- your account has the ReportAdmin role
- you know which service list and date range you want to export
When the feature is enabled, Namirial Notify exposes the report action from transaction list pages. Current environments can expose this option from service lists such as EviNotice, EviMail, EviSMS, EviPost, and EviSign.
Use the transaction list to apply the filters you need before opening the report flow.

- Open the transaction list for the service you want to report on.
- Apply the filters you want to use.
- Select the report action.
- Choose whether you need a one-off report or a scheduled report.
The report menu typically exposes these options:
- Timely for an immediate or on-demand report request
- Schedule for a recurring or planned report request
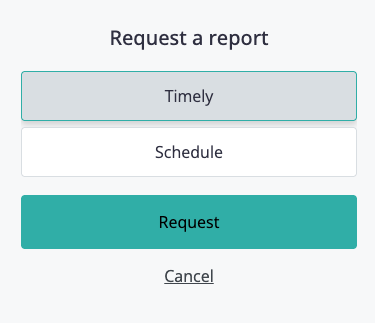
Use a timely report when you need a one-off export based on the filters and time period you select now.
- Open the report action from the transaction list.
- Select Timely.
- Set the Report period.
- Choose the reporting scope.
- Choose which date should be used for filtering.
- Select the report format.
- Select Request.
The timely-report form can include fields such as:
- Report period
Date rangeYesterdayLast weekLast monthLast 7 daysLast 30 days
- Scope
- the requesting user's own data
- organization-wide data, for site administrators and administrators
- a specific user's data, for site administrators and administrators
- Date used for filtering
- creation date
- closing date
- Report format
- Excel
- CSV
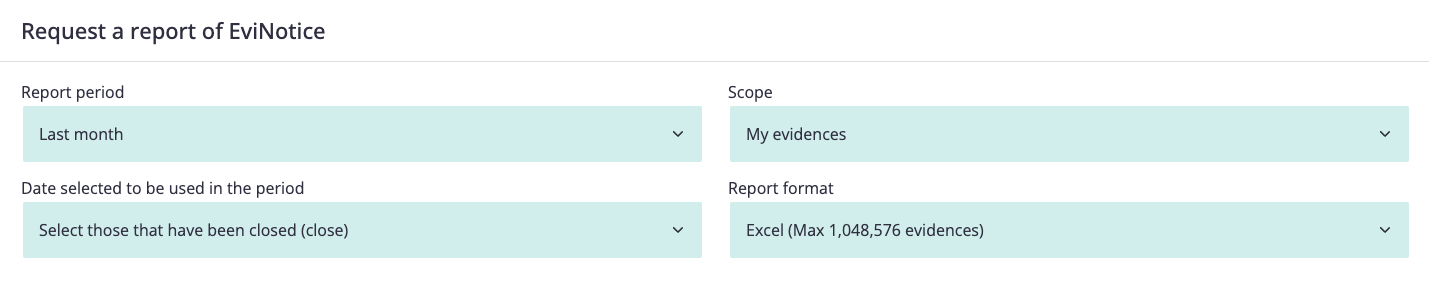
Once requested, the report is generated asynchronously.
Use a scheduled report when you want the same export to run automatically on a recurring basis.
- Open the report action from the transaction list.
- Select Schedule.
- Enable scheduling.
- Select the Delivery frequency.
- Set the report period.
- Choose the reporting scope.
- Choose which date should be used for filtering.
- Select the report format.
- Enable Use UTC Time if your reporting policy requires UTC-based dates.
- Select Schedule.
Scheduled reports can include frequency values such as:
EverydayAll weekdays (Mon to Fri)Every week (Mondays)Every month (Day 1)
The available report period depends on the selected frequency:
- daily and weekday schedules can use
YesterdayorLast 30 days - weekly schedules use
Last week - monthly schedules use
Last month
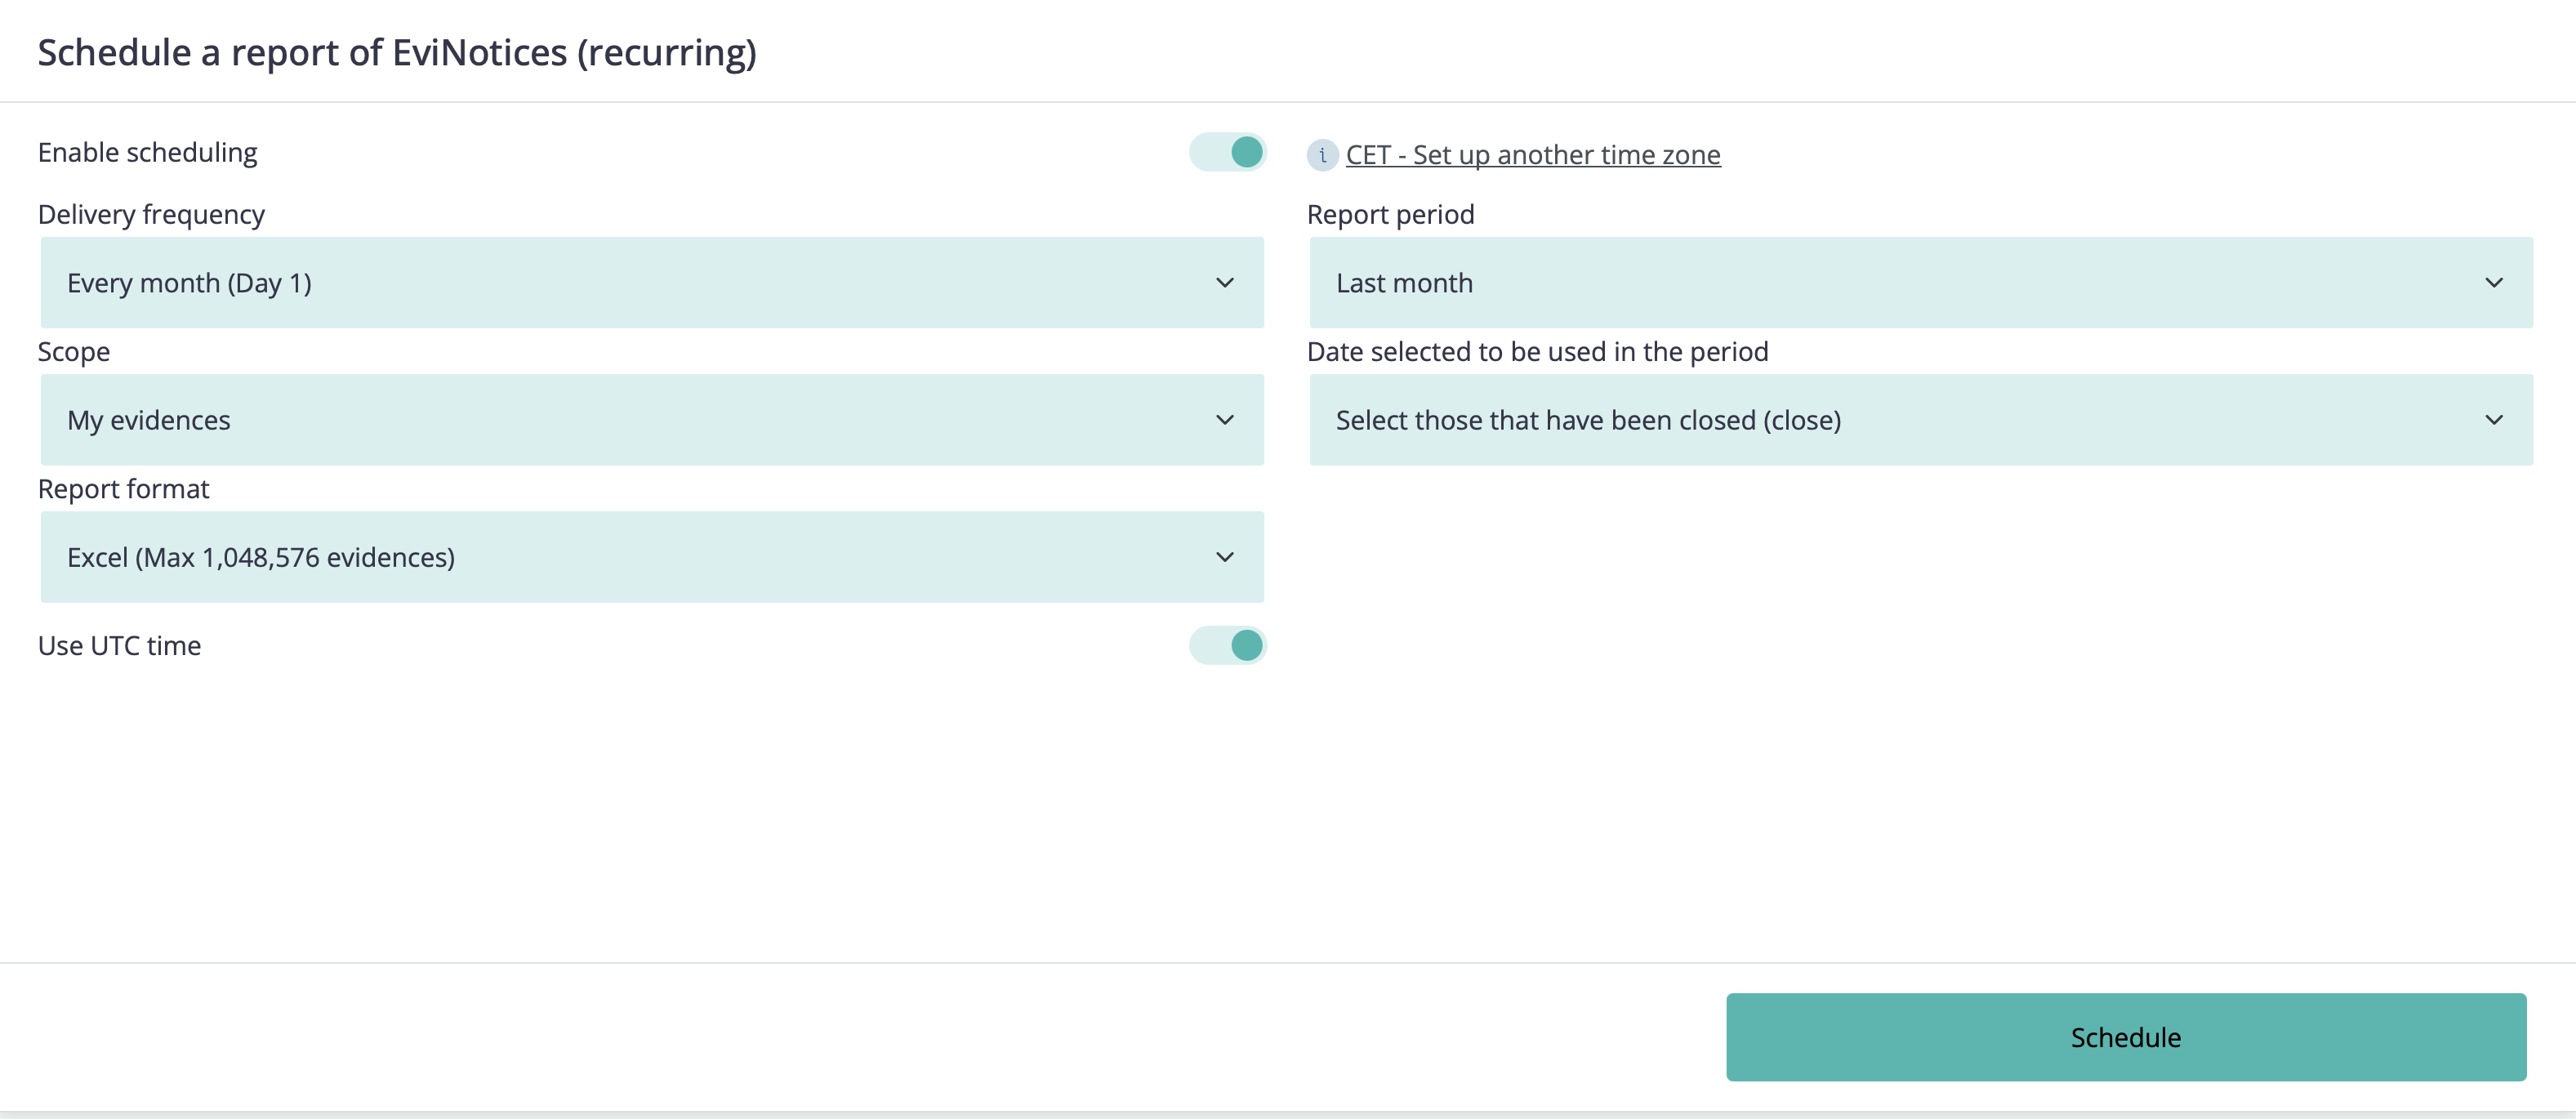
If your environment exposes the same scheduling form later, you can usually stop the recurring report by reopening it and disabling scheduling.
After a report is generated, Namirial Notify typically delivers it through a download link sent to the email address of the user who requested it.
The available output formats are usually:
- Excel - one Excel file, which can contain one or more sheets depending on the report content
- CSV - one or more CSV files, typically delivered inside a ZIP file
Depending on tenant configuration, the reporting flow can apply operational limits such as:
- a maximum report period of 31 days
If your environment behaves differently, follow the limits configured for your tenant.
Before requesting a report, confirm that:
- you are in the correct service list
- the selected filters match the data you actually need to export
- the report scope matches whether you need organization data or only one user's activity
- the date field used for filtering matches your reporting objective
- the selected output format is accepted by the downstream team or process that will consume it
You can request one-off or recurring reports from the supported transaction lists, receive the generated file through the reporting flow configured for your tenant, and use the exported data for monitoring or operational review.
Problem: You do not see the report option in the transaction list.
Cause: Reporting may not be enabled for your tenant, or your user may not have the required reporting role.
Solution:
- Confirm that reporting is enabled in your environment.
- Confirm that your user has the required reporting permissions.
- Check whether the selected service supports reporting in your tenant.
Problem: You requested a report, but you do not receive the output.
Cause: Report generation is asynchronous, the report may still be processing, or the delivery email may not have reached your inbox yet.
Solution:
- Allow additional time for asynchronous generation.
- Check the email address used by the requesting account.
- Check spam or junk folders if your environment delivers reports by email.
- Repeat the request if the first attempt clearly failed.